Table of Contents
Laundry rooms. They are often the most overlooked spaces in our homes. But think about it, you spend a good chunk of time there, right? Sorting clothes, washing, drying, folding – it's a whole process. Does your laundry room feel more like a chaotic mess than a functional space? Are you tired of staring at the same old boring walls and zero storage? Imagine transforming it into an organized and even enjoyable area. Sounds good, doesn't it? That's where DIY laundry room cabinet ideas come to the rescue! Building your own cabinets might seem like a big project, but it's totally doable and super rewarding. You can create custom storage that fits your exact needs and style. Plus, it can save you a bunch of money compared to buying pre-made cabinets. In this article, we will show you how to get creative with DIY laundry room cabinet ideas. We will guide you through a step-by-step process of building your own cabinets. Finally, we'll share essential tips for a smooth installation. Ready to ditch the laundry room chaos and create a space you actually like? Let's dive into the world of DIY laundry room cabinet ideas and get started!
Get Creative with DIY Laundry Room Cabinet Ideas
Get Creative with DIY Laundry Room Cabinet Ideas
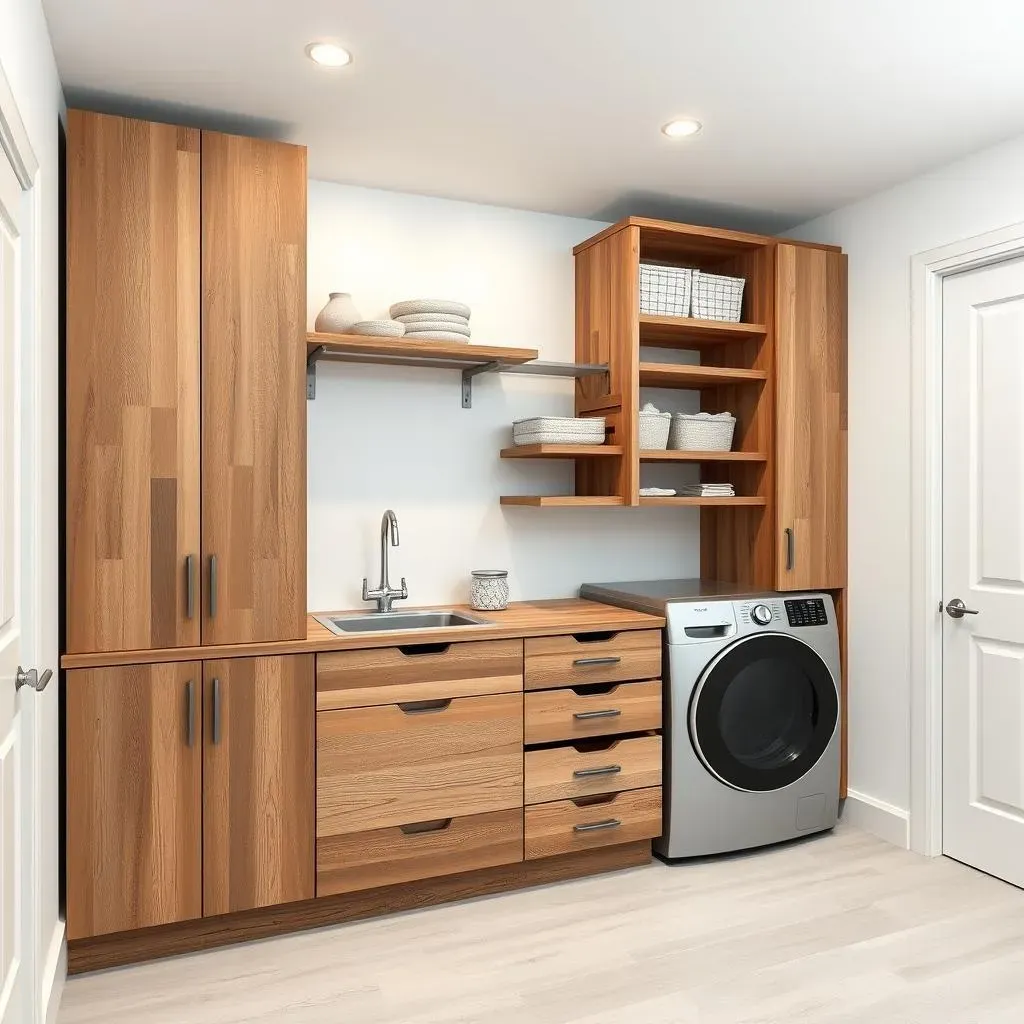
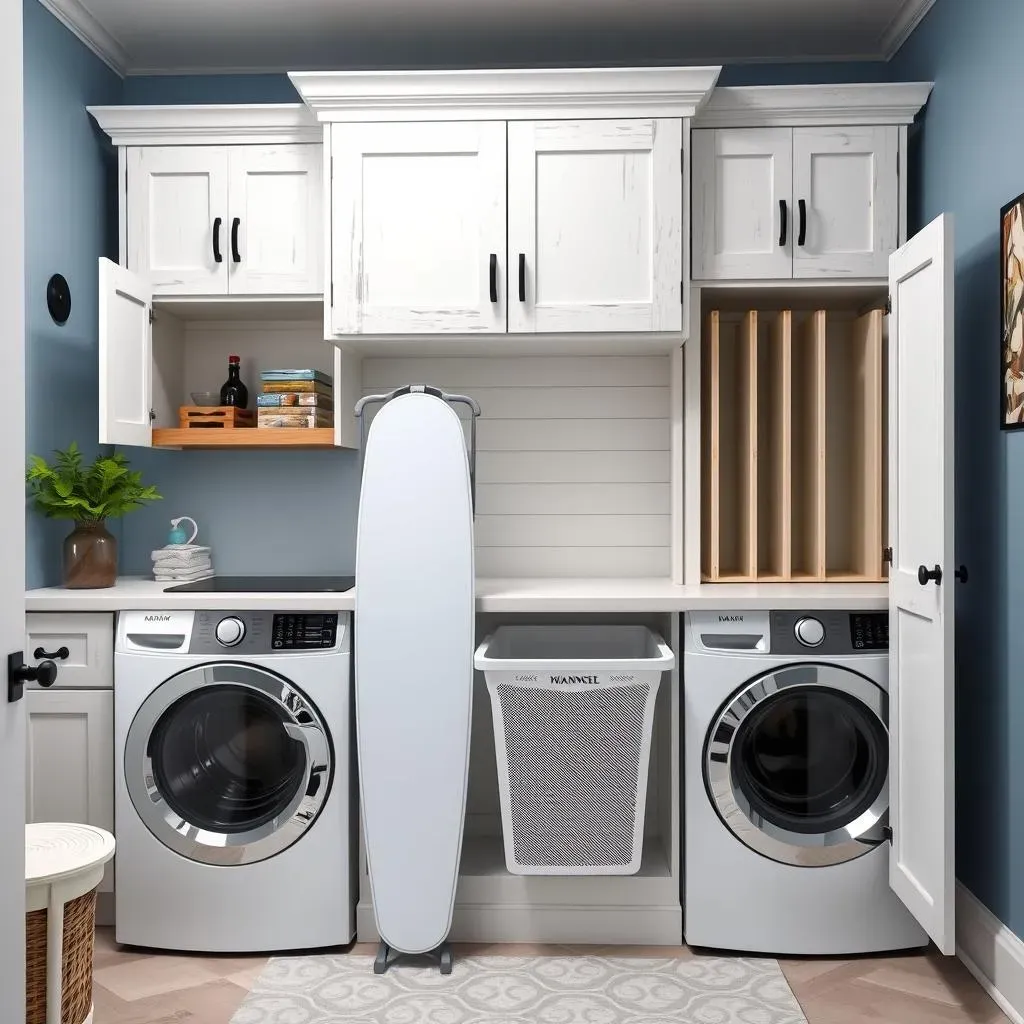
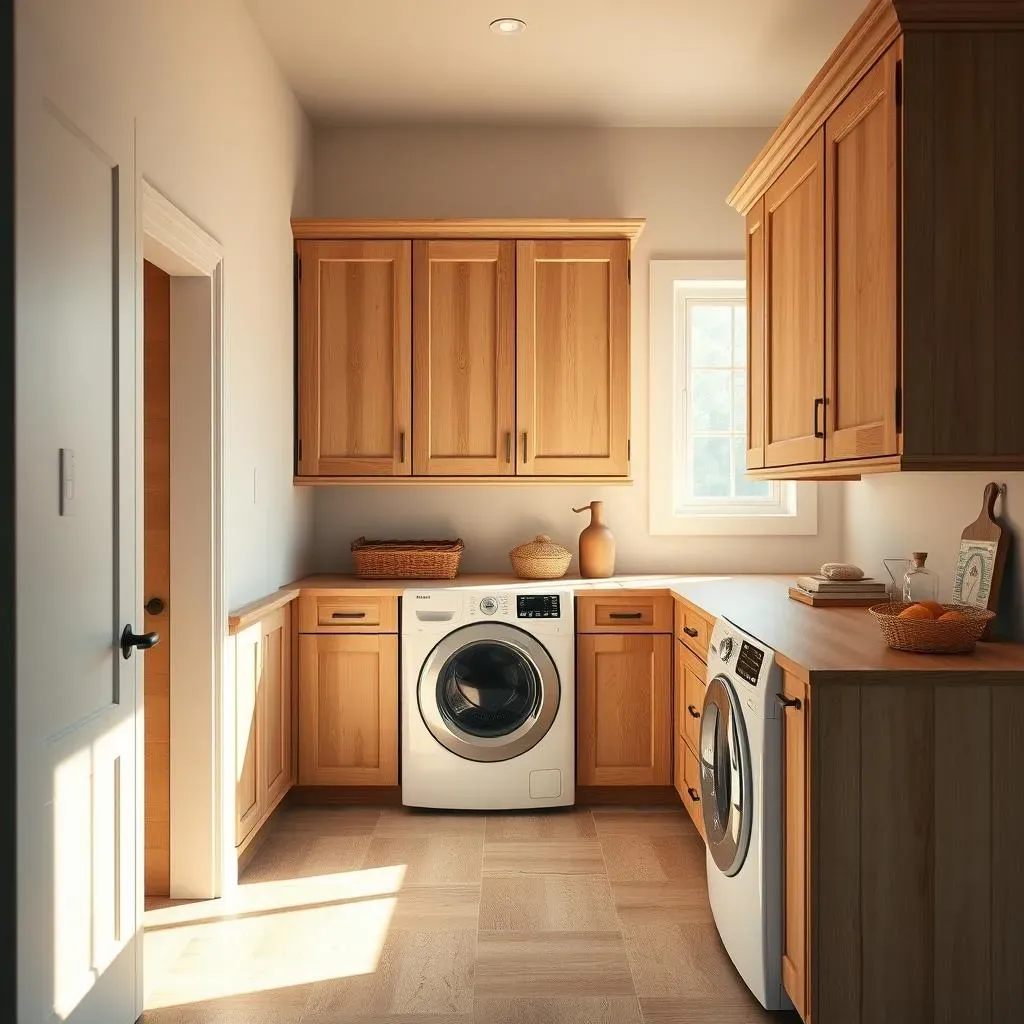
Think Outside the Box: Laundry Room Cabinet Styles
Let's ditch the boring, plain white boxes, okay? Your laundry room cabinets can be so much more than just storage. Think about your home's style. Is it modern, farmhouse, or maybe a bit rustic? Your cabinets can totally match that vibe. For a modern look, go sleek and handle-less. Farmhouse style? Shiplap doors and maybe some distressed paint would be awesome. Rustic? How about using reclaimed wood? It's like giving your laundry room a personality makeover!
Maximize Every Inch: Smart Storage Solutions
Laundry rooms are often small, so every bit of space counts. Get creative with how you use your cabinets. Instead of just shelves, think about drawers, pull-out baskets, and even vertical dividers. Drawers are amazing for detergent pods and ছোট items. Pull-out baskets? Perfect for laundry hampers that hide away. Vertical dividers can keep your ironing board or cleaning supplies neatly organized. It is all about making your limited space work harder for you.
Creative Storage Idea | What it's good for |
|---|---|
Pull-out ironing board cabinet | Hiding the ironing board when not in use |
Tilt-out hamper cabinet | Discreetly storing dirty laundry |
Vertical divider cabinet | Organizing cleaning supplies or trays |
Personalize with Color and Hardware
Color can change everything! Don't feel stuck with plain white. A pop of color can make your laundry room feel happier and brighter. Think soft blues, greens, or even a sunny yellow. And hardware? It's like jewelry for your cabinets. Cool knobs and pulls can really elevate the look. Black hardware on light cabinets is super stylish right now. Or, for a bit of fun, try colorful or unique shaped knobs. It's the little details that make a big difference.
StepbyStep Guide to Building Your Own DIY Laundry Room Cabinets
StepbyStep Guide to Building Your Own DIY Laundry Room Cabinets
Measure and Plan Like a Pro (Even if You're Not)
so you're not a superhero with a laser vision tape measure. That's totally fine. But measuring your laundry room space is the first real step. Grab a tape measure and write down the height, width, and depth where you want your cabinets. Think about where your washer and dryer are, and how much space you actually have. Sketch it out on paper. Yes, actual paper! It helps to visualize things, trust me. Now, decide what kind of cabinets you need. Do you want wall cabinets, base cabinets, or maybe a tall pantry-style cabinet? Planning now saves headaches later. Imagine building a cabinet that's too big. Not fun.
Gather Your Arsenal: Tools and Materials
Time to gather your gear. Building cabinets isn't brain surgery, but you do need some tools. A saw (circular saw or even a hand saw if you're feeling old school), a drill, a sander, and clamps are your main buddies. For materials, plywood is a good shout for cabinet boxes. It's strong and not too expensive. For cabinet doors, you can use plywood again, or get fancy with MDF if you want a super smooth painted finish. Don't forget screws, nails, wood glue, and paint or stain. And safety first, people! Get yourself some safety glasses and hearing protection. Unless you want sawdust in your eyes and ringing ears all day.
Tool | Why You Need It |
|---|---|
Circular Saw | Cutting plywood sheets to size |
Drill | Making pilot holes and driving screws |
Sander | Smoothing wood surfaces for a nice finish |
Clamps | Holding pieces together while glue dries |
Safety Glasses | Protecting your eyes from flying debris |
Hearing Protection | Saving your ears from loud power tools |
Assemble Like a Boss: Building the Cabinets
Alright, let's put things together. Cut your plywood pieces based on your plan. Measure twice, cut once – seriously, stick to that. Assemble the cabinet boxes using wood glue and screws. Clamps are your friends here to hold everything tight while the glue dries. Once the boxes are solid, it's time for doors and drawers if you're adding them. For doors, you can keep it simple with flat panels or get creative with raised panels if you have a router. Drawers are a bit trickier, but there are tons of easy drawer box plans online. Remember to sand everything down before painting or staining. Rough cabinets are not a good look.
Essential Tips for Perfect DIY Laundry Room Cabinet Installation
Essential Tips for Perfect DIY Laundry Room Cabinet Installation
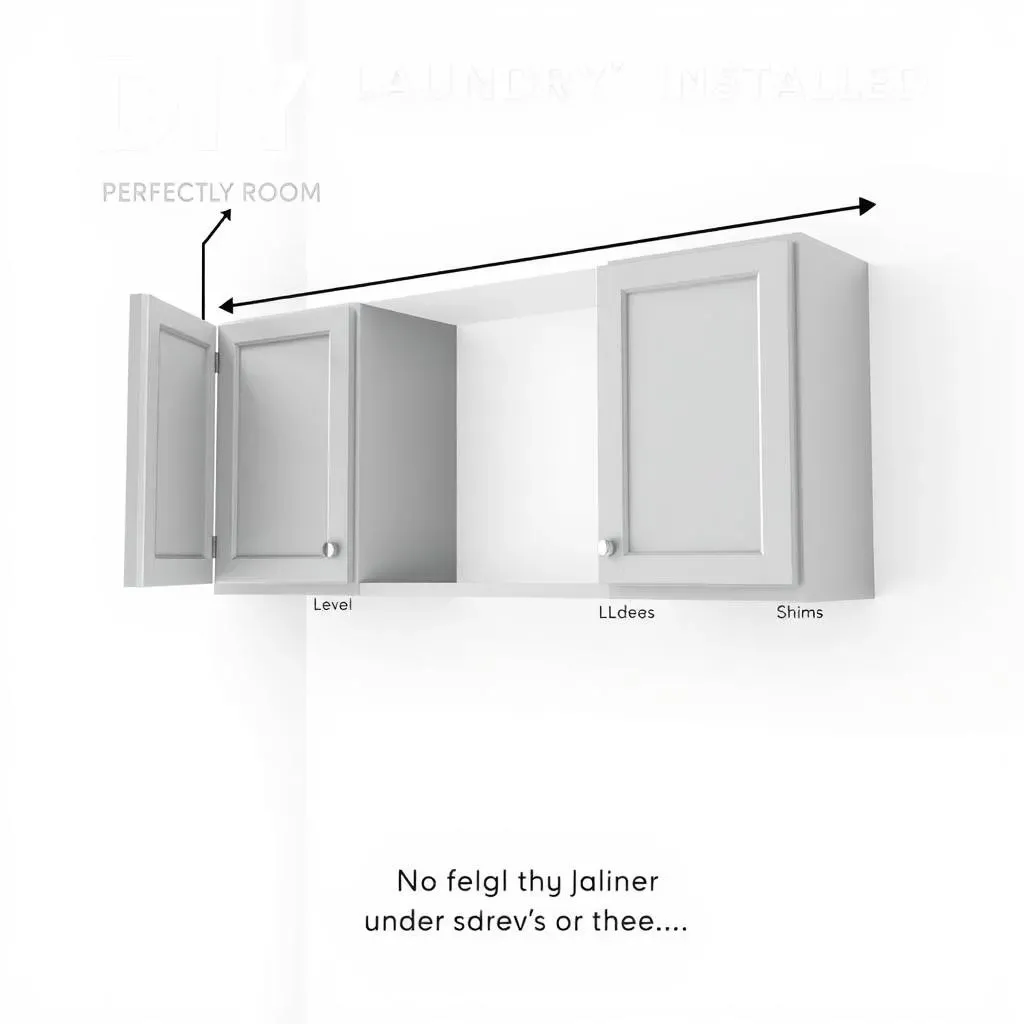
Level Up Your Install: Finding Studs and Using Shims
you've built these awesome cabinets. Now you have to hang them without them crashing down, right? First things first, find those studs in your walls. Stud finders are handy gadgets for this, or you can do the old-school knock-and-listen trick. Seriously, knocking along the wall and listening for a solid sound works. Once you find studs, mark them. This is where your screws will go to hold those cabinets securely. Walls are never perfectly straight, surprise! That's where shims come in. These little wedges of wood help you level your cabinets. Slide them behind the cabinets where needed to make sure everything is straight before you screw them in. No one wants wonky cabinets.
Hanging Like a Pro: Step-by-Step Cabinet Mounting
Time to get those cabinets on the wall. If you're hanging upper cabinets, it's helpful to draw a level line on the wall where the bottom of the cabinets will go. This gives you a guide to work with. Lift the cabinet into place. If it is a big one, get a buddy to help, don't be a hero. Line it up with your level line and the studs you marked. Pre-drill holes through the cabinet hanging rails into the studs. This prevents the wood from splitting and makes screwing easier. Use sturdy screws – cabinet screws are designed for this. Screw those cabinets in tight. For base cabinets, make sure they are level on the floor. Use shims under them if your floor is uneven. Then, screw them to the wall studs just like the upper cabinets. Stand back and admire your securely mounted cabinets. Nice job!
Installation Tip | Why It's Important |
|---|---|
Find and use wall studs | Ensures cabinets are securely mounted and won't fall |
Use shims for leveling | Makes cabinets straight and prevents a wonky look |
Pre-drill holes | Prevents wood splitting and makes screwing easier |
Use cabinet screws | Provides strong and reliable support |
Wrapping Up Your DIY Laundry Room Cabinet Project
So, you've explored some fantastic DIY laundry room cabinet ideas and learned how to build and install them yourself. Pretty cool, right? Transforming your laundry room from a drab, disorganized space into a functional and stylish area is within your reach. It might take a bit of effort, but imagine the satisfaction every time you walk into your newly organized laundry room. No more clutter, just smart storage solutions you built with your own hands. Ready to make laundry day a little less chaotic and a lot more enjoyable? Go ahead and start planning your DIY laundry room cabinet project today!