Table of Contents
Is your laundry room a chaotic mess? Tired of tripping over detergent bottles and mountains of linens? You're not alone! Small laundry spaces often lack adequate storage, turning what should be a simple chore into a stressful scramble. But imagine stepping into an organized, functional laundry room, where everything has its place. That dream is totally achievable with some simple **diy laundry room shelving**! This guide will walk you through creating easy-to-build floating shelves, perfect for even the smallest laundry closets. We're talking about a weekend project that won't break the bank but will completely transform your laundry routine. Ready to ditch the clutter and boost your laundry room's efficiency and style? Let's get building!
Easy Steps to Perfect DIY Laundry Room Shelving
Easy Steps to Perfect DIY Laundry Room Shelving
1. Visualize and Plan Your Laundry Shelves
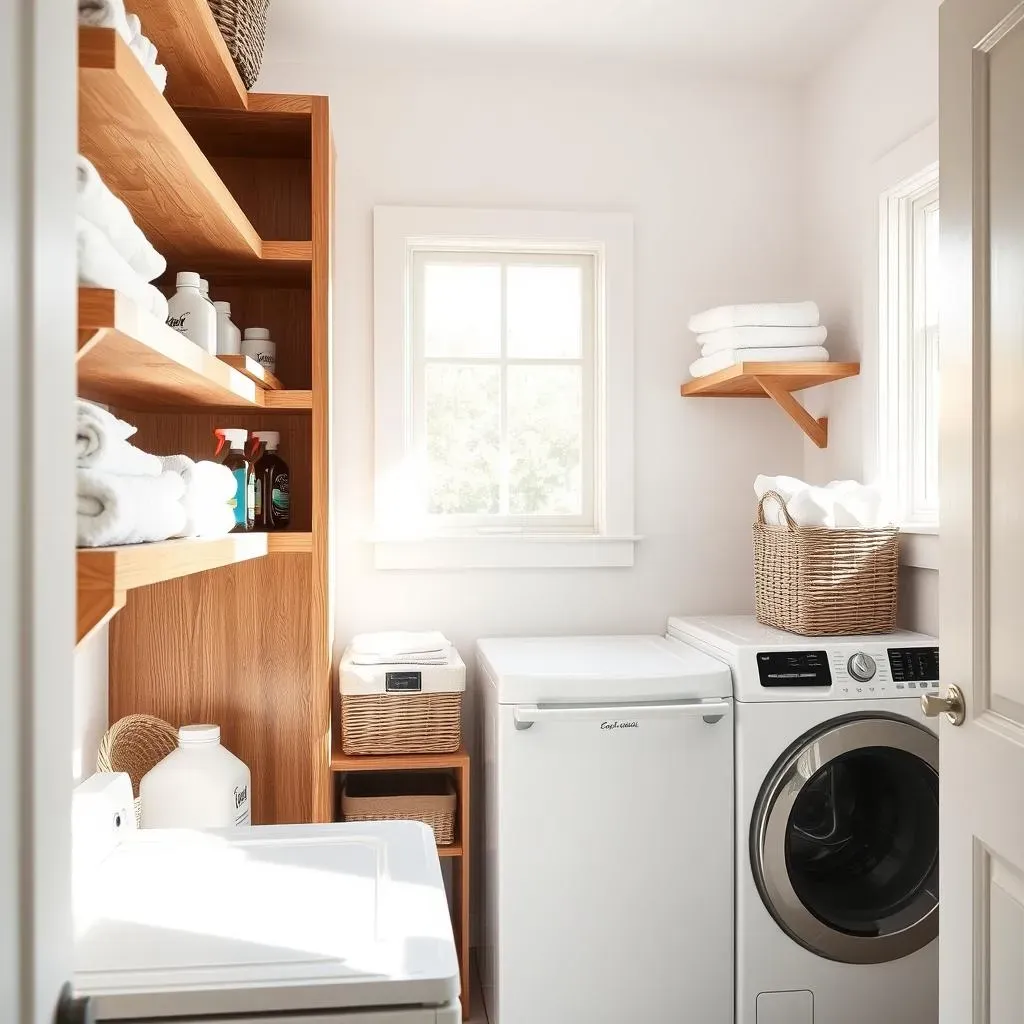
Before you even think about picking up a hammer, let's talk vision. What do you actually need from your **diy laundry room shelving**? Are you drowning in detergent bottles? Need a spot for folded towels? Or maybe you just want to pretty up the space with some plants and cute baskets. Take a good look at your laundry room and really think about your storage needs. Sketch it out, measure the walls, and get a feel for the space. This planning stage is key to making sure your shelves are both functional and look awesome. No one wants shelves that are too small or in the wrong spot!
Think about shelf depth too. Deep shelves can swallow up smaller items, making them hard to reach. Shallower shelves are great for displaying items and keeping things accessible. Consider adjustable shelves if you want flexibility down the road. And don't forget about vertical space! High shelves are perfect for storing less frequently used items, freeing up prime real estate for everyday essentials. Get those measuring tapes out and let's map out your dream laundry room storage!
2. Gather Your Supplies and Tools
Alright, planning's done, time to get our hands dirty! For these **easy steps to perfect diy laundry room shelving**, you won't need a ton of fancy tools. Think of it as a weekend warrior project, not major construction. For materials, we're keeping it simple and budget-friendly. Pine boards are a great choice for the supports – they're sturdy and easy to work with. For the shelves themselves, plywood or MDF are perfect. They give you a smooth surface and won't break the bank. Grab some screws, wood glue, sandpaper, and your chosen finish – paint, stain, whatever floats your boat!
Tool-wise, you'll need a drill (power drill is your friend here!), a level (essential for straight shelves!), a measuring tape, a pencil, and safety glasses. If you're cutting your own wood (most home improvement stores will do this for you, BTW), you'll need a saw – a circular saw or even a handsaw will work. Don't forget clamps if you're using wood glue – they help hold everything in place while it dries. Pro-tip: gather everything before you start. Nothing kills momentum like realizing you're missing a crucial screw halfway through!
Materials | Tools |
|---|---|
1x2 inch Pine Boards (for supports) | Drill with drill bits |
3/4 inch Plywood or MDF (for shelves) | Level |
Screws (various lengths) | Measuring Tape |
Wood Glue | Pencil |
Sandpaper | Safety Glasses |
Paint or Stain (and brushes/rollers) | Saw (optional, if cutting wood yourself) |
Wood filler (optional, for filling screw holes) | Clamps (optional, but helpful for gluing) |
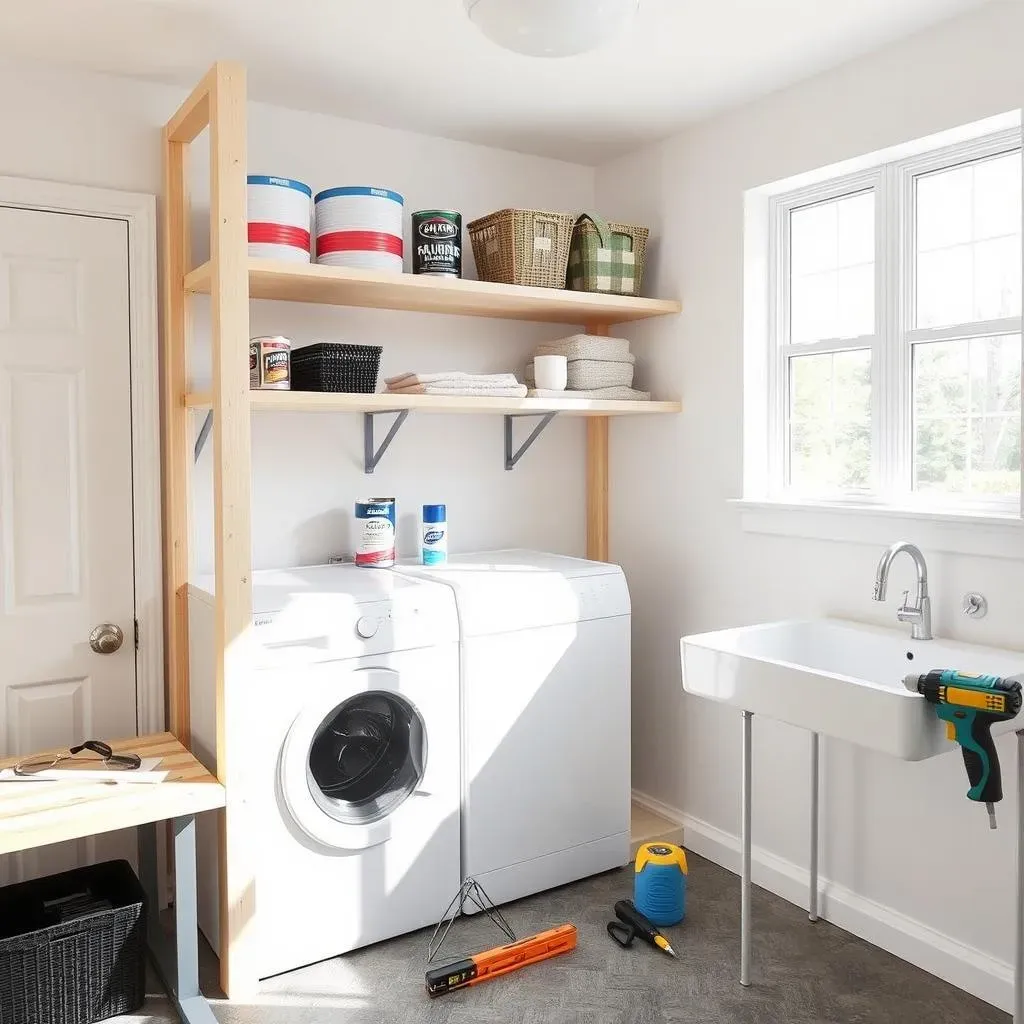
3. Install Your Shelf Supports with Precision
let's get those supports up! This is where the magic starts to happen, and your **diy laundry room shelving** begins to take shape. The key here is precision and using a level. Nobody wants wonky shelves! First, locate your wall studs. These are the sturdy wooden beams behind your drywall that you need to screw into for a secure hold. A stud finder is your best friend here, but you can also use the old-fashioned knock-and-listen method – studs sound solid, drywall sounds hollow. Once you've found your studs, mark their locations clearly.
Now, hold your first pine support board against the wall at your desired shelf height. Use your level to make sure it's perfectly horizontal. Pre-drill holes through the support board and into the studs – this prevents the wood from splitting. Then, screw the support board securely to the wall. Repeat this for all your support boards, ensuring they are level with each other and spaced correctly for your shelf depth. Take your time with this step – solid supports are the foundation of strong and reliable laundry room shelves. Imagine the satisfaction of perfectly level shelves – pure DIY bliss!
Materials & Tools for Your DIY Laundry Room Shelves Project
Materials & Tools for Your DIY Laundry Room Shelves Project
Materials & Tools for Your DIY Laundry Room Shelves Project
let's dive into what you'll actually need to make these **diy laundry room shelving** dreams a reality. The awesome thing about this project is that we're keeping it super simple and budget-friendly. You won't need to raid a hardware store or empty your wallet. We're talking basic lumber, some screws, and tools you probably already have or can easily borrow. Think of it as a low-key, high-reward kind of DIY. We're using common materials that are easy to find at any home improvement store and tools that are beginner-friendly. This isn't about fancy woodworking, it's about getting organized and feeling good about what you built yourself!
Materials | Tools |
|---|---|
1x2 inch Pine Boards (for supports) | Drill with drill bits |
3/4 inch Plywood or MDF (for shelves) | Level |
Screws (various lengths - check your wood thickness!) | Measuring Tape |
Wood Glue (optional, but adds extra strength) | Pencil |
Sandpaper (for smoothing edges) | Safety Glasses (safety first!) |
Paint or Stain (and brushes/rollers - get creative!) | Saw (optional, if you're cutting your own wood) |
Wood filler (optional, for hiding screw holes for a super clean look) | Clamps (optional, but helpful if you're using wood glue) |
Once you've got your materials and tools rounded up, you're seriously ready to roll. Next up, we're tackling the support system – getting those shelves securely attached to the wall!
Building Your Own DIY Laundry Room Shelving: StepbyStep Guide
Building Your Own DIY Laundry Room Shelving: StepbyStep Guide
Step 4: Securely Attach Your Shelf Tops
Alright, supports are up, looking good! Now for the super satisfying part: adding the shelf tops! This is where your **building your own diy laundry room shelving** project really starts to look like, well, shelves! Grab your pre-cut plywood or MDF shelf pieces. Carefully lift one onto the supports. Make sure it's centered and sitting snugly on all the supports. No gaps allowed! If you used wood glue on the supports (good job, extra sturdy shelves!), let it dry a bit so the shelf doesn't slide around too much.
Time to screw those tops down. Using your drill, pre-drill holes through the shelf top and into the support boards underneath. This prevents splitting and makes screwing easier. Then, drive screws through those pilot holes, securing the shelf top to the supports. Counter-sinking the screws slightly will give you a smoother finish later on. Repeat this for all your shelves. Step back and admire your progress – you're officially building shelves! It's pretty cool to see it come together, right?
Step 5: Add a Face Piece for a Polished Look (Optional)
Want to take your **building your own diy laundry room shelving** project from “nice” to “wow”? Consider adding a face piece! This is totally optional, but it makes a huge difference in the finished look. A face piece is just a strip of wood that you attach to the front edge of the shelf. It makes the shelves look thicker and more substantial, giving them a custom, built-in vibe. Plus, it hides the plywood or MDF edge, which can sometimes look a little unfinished.
For the face piece, you can use 1x2 pine, or even a thinner piece of decorative trim. Cut it to the length of your shelf front. You can attach it with wood glue and brad nails, or just wood glue and clamps. Make sure it’s flush with the top and bottom of the shelf. If you’re feeling fancy, you can even miter the corners for a super clean look. But even a simple straight cut face piece will elevate your DIY shelves. Trust me, it's worth the little extra effort!
- Optional Face Piece Materials:
- 1x2 inch Pine (for a thicker look)
- Decorative Trim (for a more detailed edge)
- Wood Glue
- Brad Nails (optional, for faster attachment)
- Clamps (if using only wood glue)
Step 6: Finishing – Paint, Stain, and Seal
Almost there! The final step in your **building your own diy laundry room shelving** adventure is finishing. This is where you get to personalize your shelves and protect the wood. Paint is a classic choice for laundry rooms – it’s durable, easy to clean, and you can match it to your wall color or add a pop of color. Stain is another great option if you want to highlight the wood grain and add warmth. There are tons of stain colors to choose from, from light and natural to rich and dark.
No matter if you paint or stain, sealing is key, especially in a laundry room where things can get damp. A clear sealant will protect the wood from moisture and make it easier to wipe up spills. Before you finish, make sure to fill any screw holes with wood filler and sand everything smooth. This will give you a professional-looking finish. Then, grab your brushes or rollers and get creative! Finishing is the fun part where you really make these shelves your own. Imagine stepping into your newly organized and stylish laundry room – all thanks to your awesome DIY skills!
Customizing Your DIY Laundry Room Shelves for Style and Function

Customizing Your DIY Laundry Room Shelves for Style and Function
Paint, Stain, or Go Bold with Color!
so you've got the basic shelves built – awesome! But now comes the fun part: making them truly yours with **customizing your diy laundry room shelves for style and function**. Let's talk finishes! Paint is always a winner – you can match your wall color for a seamless look, or go bold with a fun accent color to really make those shelves pop. Think a cheerful sunny yellow or a calming spa-like blue. Chalk paint is another cool option for a more rustic, farmhouse vibe. And don't underestimate the power of stain! A beautiful wood stain can highlight the natural grain and add a touch of warmth and sophistication. Imagine rich walnut stain against crisp white walls – so classy!
Don't be afraid to get creative! Consider painting the shelf supports one color and the shelves themselves another. Or add a stencil design to the face pieces for a unique touch. Metallic paint accents can also add a touch of glam. The possibilities are endless! Think about the overall style you're going for in your laundry room. Is it modern and minimalist? Rustic farmhouse? Bright and cheerful? Let your paint or stain choices reflect that style and really elevate your DIY shelves from functional to fabulous.
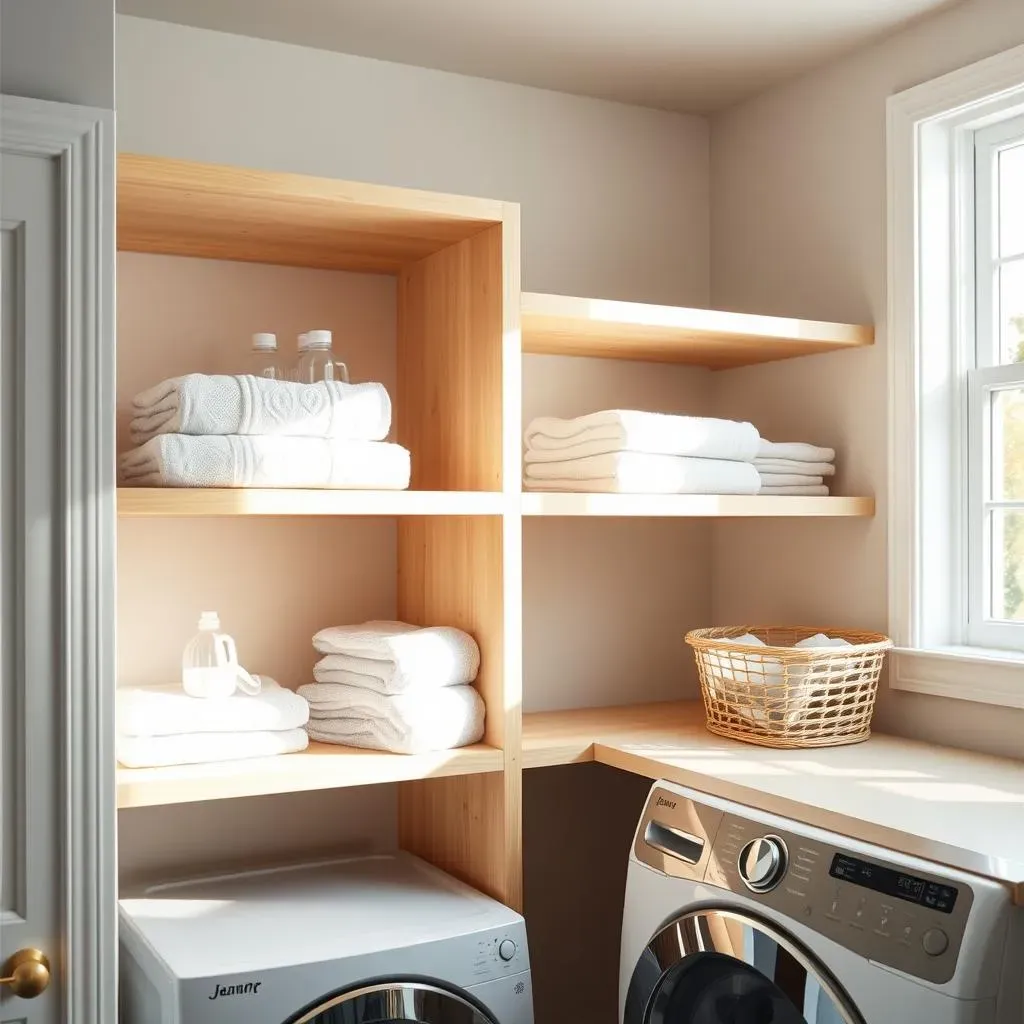
Shelf Depth and Adjustability: Tailor-Made Functionality
Beyond just looks, **customizing your diy laundry room shelves for style and function** is all about making them work exactly how you need them to. Think about shelf depth. Standard depth is fine, but consider shallower shelves if you’re mostly storing smaller items like detergent bottles or folded cloths. Shallower shelves make everything easier to see and grab. Deeper shelves are great if you need to store larger items, like bulky baskets or spare linens. But too deep and things can get lost in the back!
And what about adjustability? Fixed shelves are simple, but adjustable shelves give you so much more flexibility. Imagine being able to move shelves up or down as your storage needs change. You can buy adjustable shelf supports, or even get creative with pegboard or slotted standards. Think about what you’ll be storing and how you want to organize it. Tailoring the shelf depth and adjustability to your specific needs is what truly makes DIY shelving so much better than store-bought!
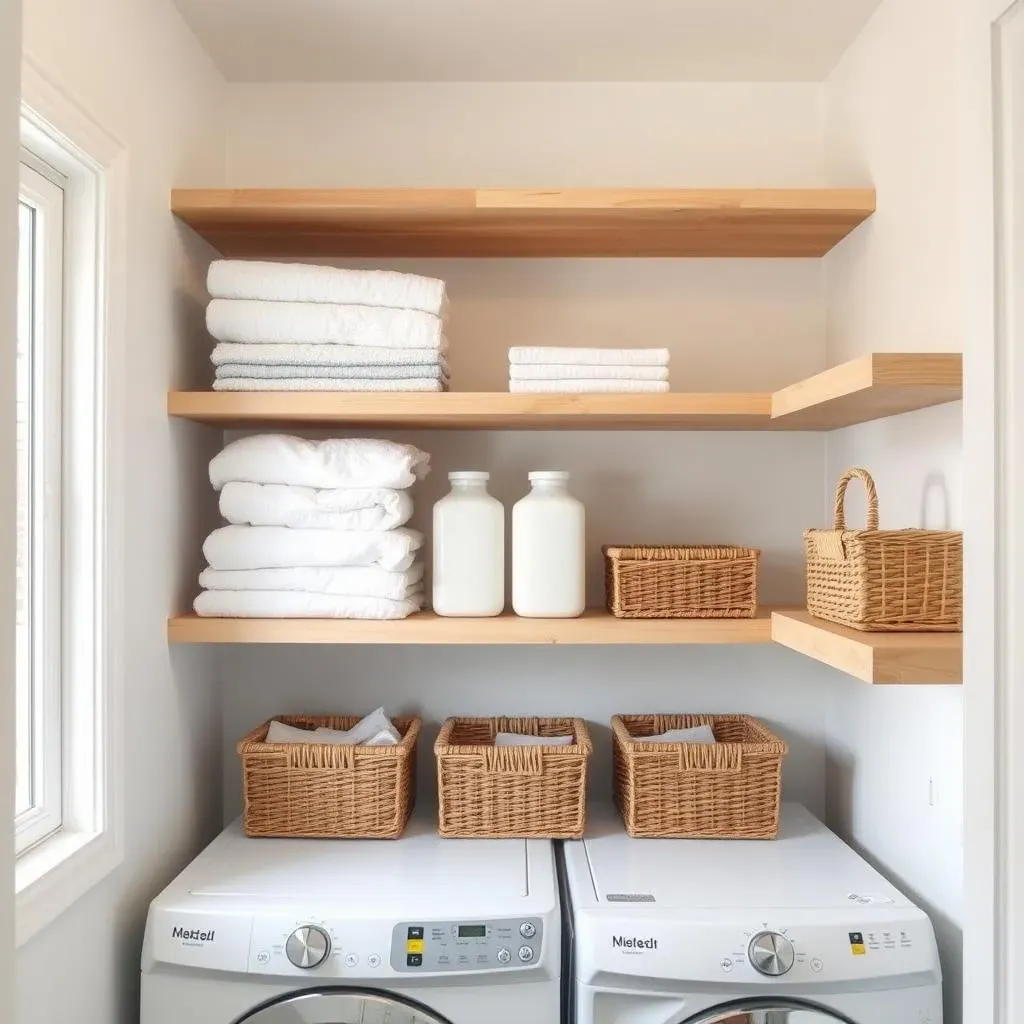
Baskets, Bins, and Beyond: Stylish Storage Solutions
Let's talk organization, but make it stylish! **Customizing your diy laundry room shelves for style and function** isn't complete without the right storage containers. Baskets and bins are your best friends here. Woven baskets bring texture and warmth, perfect for a farmhouse or bohemian style. Sleek wire baskets are great for a modern or industrial look. Clear plastic bins are super practical for seeing exactly what's inside – no more mystery items lurking on your shelves! Fabric bins add softness and can be easily folded away when not in use.
Think beyond just basic bins too. Glass jars are beautiful for storing laundry pods or clothespins. Metal canisters add a vintage touch. Even decorative boxes can corral smaller items and add personality. Consider adding labels to your bins and baskets – it's not just practical, it looks super organized and chic. The right baskets and bins not only maximize your shelf space, but they also become part of the overall style of your laundry room. It's all about creating a space that's both functional and a joy to be in!
Enjoy Your Organized Laundry Room with DIY Shelving
Enjoy Your Organized Laundry Room with DIY Shelving
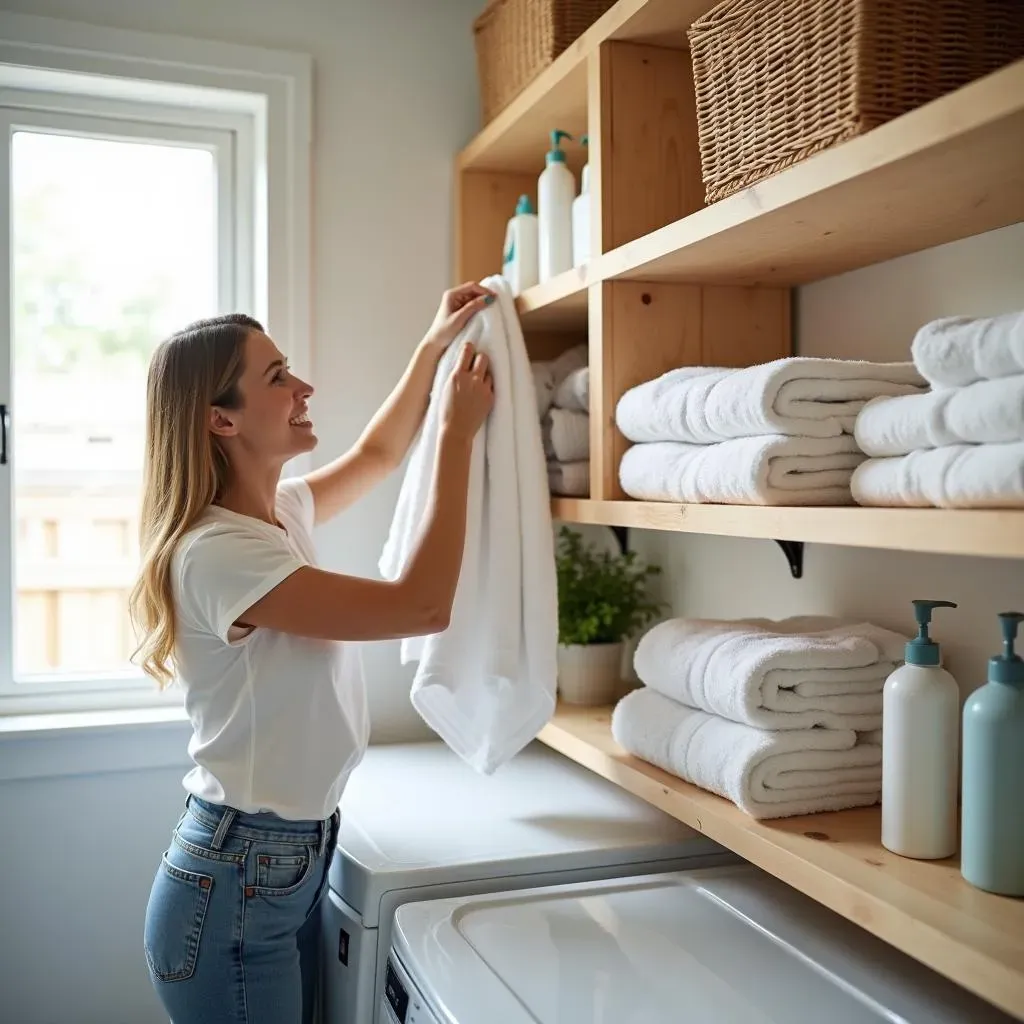
And there you have it! You've conquered the clutter and created amazing **diy laundry room shelving** that’s both functional and stylish. Seriously, step back and take it all in! Remember those chaotic piles of laundry supplies? Gone! Now you have a beautifully organized space, customized exactly to your needs. Imagine how much easier laundry day will be – everything in its place, easy to find, and your laundry room is actually a pleasant space to be in. That’s the magic of DIY! You not only gain valuable storage, but you also get the satisfaction of knowing you built it yourself. So go ahead, load up those shelves, admire your handiwork, and finally, truly **enjoy your organized laundry room with DIY shelving**!
Wrapping Up Your DIY Laundry Room Shelving Project
And just like that, you've conquered laundry room chaos with your own **diy laundry room shelving**! These simple floating shelves aren't just about extra storage; they're about reclaiming your space and making laundry day less of a headache. From a jumbled mess to an organized haven, you've proven that a little DIY can go a long way. Now, stand back, admire your handiwork, and enjoy the newfound serenity in your newly organized laundry room. Maybe even treat yourself to some fancy new laundry detergent to christen those beautiful shelves!