Table of Contents
Tired of that sad, builder-grade utility sink in your laundry room? Does it stick out like a sore thumb, clashing with your vision of a stylish and functional home? You're not alone. Many homeowners face the same dilemma: a laundry space that's more drab than fab. But what if you could transform that uninspiring corner into a practical and even beautiful area, all without breaking the bank? That's where the magic of a **diy laundry room sink** comes in. This guide is your roadmap to creating a custom sink setup that perfectly fits your needs and style. We'll walk you through everything, from understanding the perks of going DIY and gathering your essential tools, to step-by-step building instructions and inspiring design ideas. Plus, we'll share pro tips to keep your **diy laundry room sink** looking great for years to come. Ready to ditch the dull and dive into a rewarding DIY project? Let's get started and build the laundry room sink of your dreams!
Why Choose a DIY Laundry Room Sink? Benefits and Advantages
Why Choose a DIY Laundry Room Sink? Benefits and Advantages
Save Cash and Get Exactly What You Want
Let's be real, store-bought laundry room sinks can be surprisingly pricey. You walk into a big box store, expecting a simple utility sink, and suddenly you're staring at price tags that make you question if you accidentally wandered into a luxury spa showroom. Building a **diy laundry room sink**, on the other hand, can save you a significant chunk of change. Think about it: you're mainly paying for materials, and if you're resourceful, you can even repurpose or upcycle items, cutting costs even further. But the savings aren't the only perk.
Going the DIY route also hands you the reins on customization. Ever feel like pre-made sinks are *almost* right, but just not quite? Too big, too small, wrong material, style that clashes with your laundry room vibe? With a **diy laundry room sink**, you call the shots. Need a shallow basin for delicate handwashing? Want a deep sink to soak those extra-grimy gardening clothes? Dreaming of a farmhouse-style sink in your laundry room? DIY lets you tailor the size, depth, materials, and overall look to perfectly match your laundry needs and personal style. It's about creating a sink that's not just functional, but also fits seamlessly into *your* home.
Bragging Rights and Boosting Your DIY Skills
Beyond the practical benefits, there's a certain satisfaction that comes from saying, "Yeah, I built that." Seriously, stepping back and admiring a **diy laundry room sink** that you crafted with your own two hands? That's a feeling you can't buy off the shelf. It's about more than just having a place to rinse out muddy boots; it's about the sense of accomplishment and the pride in knowing you tackled a project and made something useful and lasting for your home. Plus, let's be honest, it's a great conversation starter when guests come over – "Oh, that sink? Yeah, I made it."
And speaking of skills, diving into a **diy laundry room sink** project is a fantastic way to level up your DIY game. Maybe you're a beginner looking to learn the basics of woodworking or plumbing, or perhaps you're more experienced and want to refine your skills. Either way, this project offers a tangible learning experience. You'll get hands-on with tools, materials, and techniques, building confidence and know-how that extends far beyond just sinks. Think of it as an investment in yourself and your home improvement abilities. Who knows? Your success with this **diy laundry room sink** might just be the push you need to tackle that kitchen renovation you've been dreaming about.
DIY Laundry Room Sink | Store-Bought Laundry Room Sink |
|---|---|
Potentially Lower Cost | Higher Initial Cost |
Fully Customizable | Limited Customization Options |
Develop DIY Skills | No Skill Development |
Sense of Accomplishment | Convenience (but less personal touch) |
Essential Tools and Materials for Your DIY Laundry Room Sink Project
Essential Tools and Materials for Your DIY Laundry Room Sink Project
Gather Your Arsenal: Tools for DIY Domination
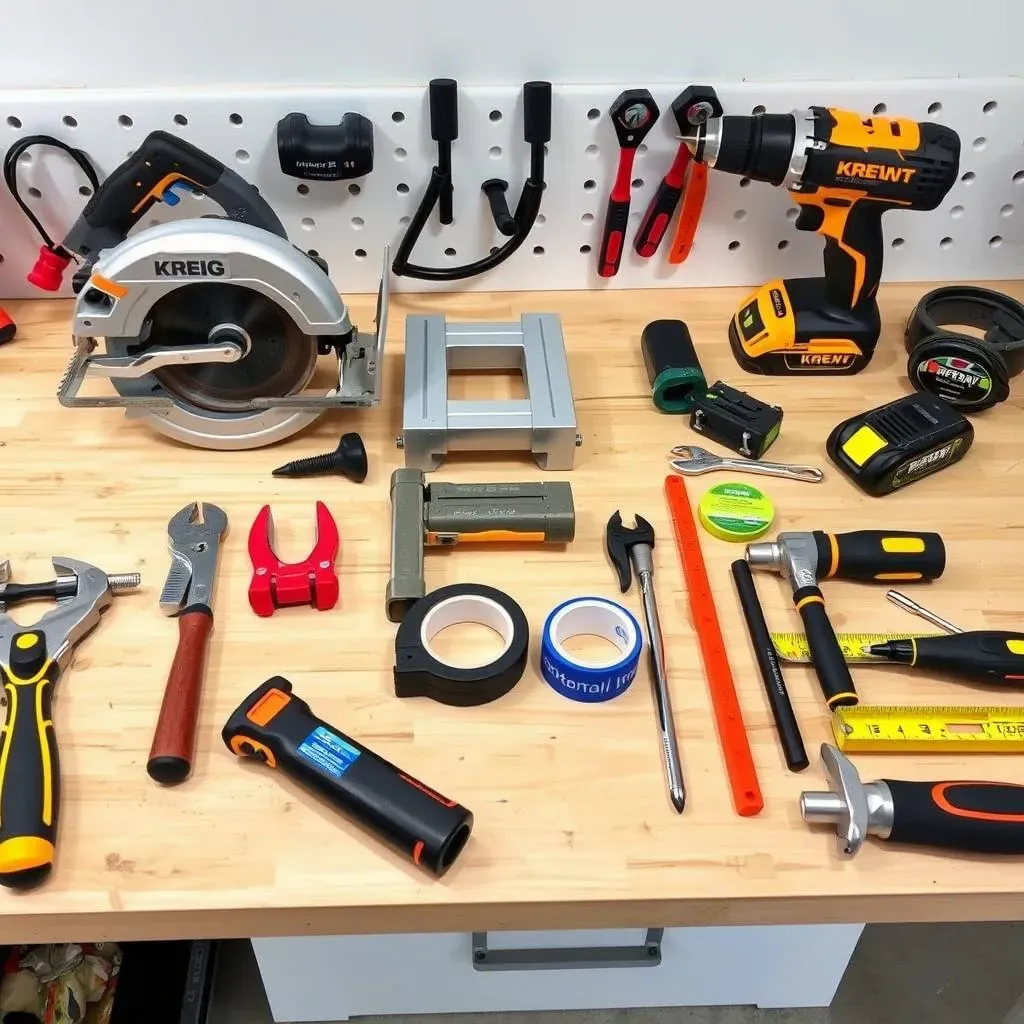
Alright, so you're hyped about building your own **diy laundry room sink**, awesome! But before you go swinging a hammer, let's talk gear. Think of this as gathering your superhero toolkit – you can't save the day without the right gadgets, right? For a **diy laundry room sink**, you'll need a mix of woodworking and plumbing tools, plus some general DIY essentials. Don't freak out, you probably already have a good chunk of this stuff if you're even a little bit handy. If not, think of it as an investment – good tools are like good shoes, they'll last you and make every job easier.
First up, for the woodworking side of things, you'll want a saw – circular saw or miter saw are great for cutting boards straight. A drill is non-negotiable, for pilot holes and driving screws. A Kreg Jig is seriously your best friend for creating strong, hidden joints in wood – makes things look super pro. Don't forget clamps to hold things together while glue dries or screws go in. Measuring tape and a level are crucial, unless you're going for that charmingly crooked look (spoiler: probably not for a sink). And safety glasses! Seriously, protect those peepers, sawdust in the eye is no fun.
Tool Category | Essential Tools |
|---|---|
Woodworking | Circular Saw or Miter Saw, Drill, Kreg Jig, Clamps, Measuring Tape, Level, Safety Glasses |
Plumbing | Pipe Wrench, Adjustable Wrench, Teflon Tape, Plumber's Putty (maybe - depends on your drain), Basin Wrench (can be helpful) |
General DIY | Screwdrivers, Hammer, Pencil, Utility Knife, Sandpaper, Paintbrushes/Rollers (if painting), Caulk Gun |
For the plumbing side, things are a bit simpler. You'll definitely need pipe wrenches – two is better than one for tightening pipes. Adjustable wrenches are also super handy. Teflon tape is your plumbing BFF, wrap that on threads to prevent leaks. Plumber's putty *might* be needed depending on your drain setup – check your sink basin instructions. A basin wrench can be a lifesaver for tightening those tricky nuts under the sink, especially in tight spots, but not always essential. And for general stuff? Screwdrivers, hammer, pencil, utility knife – the usual suspects. Sandpaper for smoothing wood, paintbrushes or rollers if you're painting your sink base, and a caulk gun for sealing around the sink edges to prevent water damage. See? Not rocket science. Just a solid toolkit to make your **diy laundry room sink** dreams a reality.
StepbyStep Guide: Building a Simple & Functional DIY Laundry Room Sink

StepbyStep Guide: Building a Simple & Functional DIY Laundry Room Sink
Planning & Prepping: Nail Down Your Design and Gather Supplies
let's get down to brass tacks and actually build this **diy laundry room sink**! First things first, you can't just dive in headfirst (unless you *want* a watery mess and a half-finished project). Planning is key. Think about where your sink is going to live in your laundry room. Measure that space like you're a home-staging pro. Consider the size of the sink basin you want – big enough for your needs, but not so huge it overwhelms the room. Sketch out a basic design. Are you going for a simple freestanding sink? Or something built into existing cabinetry? Knowing this upfront will save you headaches later.
Once you have a general idea, it's time to make a materials list. This will vary depending on your design, but at a minimum, you'll need wood for the sink base (plywood, pine, even reclaimed wood if you're feeling eco-chic), a sink basin (utility sinks are readily available at home improvement stores, or get creative with a vintage find!), plumbing supplies (drain, P-trap, supply lines to connect to your water source), screws, nails, wood glue, and whatever finish you're planning (paint, stain, sealant). Don't forget safety gear – gloves and safety glasses are a must. Pro-tip: measure twice, cut once. Seriously, write it on a sticky note and put it on your forehead if you have to. Accurate measurements are your friend in DIY.
Framing the Foundation: Building the Sink Base
Alright, with your plan in hand and materials assembled, let's get building the bones of your **diy laundry room sink** – the base. This is where those woodworking tools come into play. Start by cutting your wood pieces according to your measurements. If you're using a Kreg Jig (and seriously, you should, it makes life so much easier), now's the time to whip it out and drill pocket holes. Assemble the sides, front, and back of your sink base frame using wood glue and screws, or pocket hole screws if you're Team Kreg. Clamps are your extra set of hands here, holding things snug while the glue sets or you drive in screws. Make sure everything is square and level – nobody wants a wobbly sink.
Once the main frame is together, add any internal supports or shelves you planned for. This might be a lower shelf for storage, or cross braces to add extra stability, especially if you're using a heavier sink basin. If you're planning doors for your sink base, now's a good time to think about how those will attach and if you need to add any framing for hinges. Remember that cleat system we mentioned earlier? If you're going that route for a countertop, attach those cleats to the inside of your frame now. Basically, you're building a sturdy box that's going to hold your sink and potentially some laundry supplies. Take your time, double-check your measurements, and don't be afraid to take a coffee break – Rome wasn't built in a day, and neither is an awesome **diy laundry room sink**.
Step | Action | Tools/Materials |
|---|---|---|
1. Plan & Measure | Determine sink location, size, and design. Measure space accurately. | Measuring tape, pencil, paper for sketching |
2. Gather Materials | Collect wood, sink basin, plumbing supplies, fasteners, finish, safety gear. | Materials list, shopping list |
3. Cut Wood | Cut wood pieces according to your measurements for the sink base frame and supports. | Saw (circular or miter), measuring tape |
4. Assemble Frame | Join sides, front, and back of the base using glue and screws (or pocket hole screws). | Wood glue, screws, drill, Kreg Jig (optional), clamps, level, square |
5. Add Supports/Shelves | Install internal supports, shelves, or door framing as needed. | Wood, screws, drill |
Finishing Touches & Plumbing Hookups: From Base to Basin
With the sink base framed up and solid, it's time for the fun part – making it look less like a construction project and more like a functional and stylish **diy laundry room sink**. If you're painting or staining your base, do that now, *before* you install the sink basin. It's way easier to get a nice even finish when you're not working around a bulky sink. Let your paint or stain dry completely according to the product instructions – patience is a virtue, especially when it comes to finishes.
Once the finish is dry, carefully place your sink basin into the opening in your base. It should fit snugly. If you're using a drop-in sink, secure it according to the manufacturer's instructions – usually with clips or sealant. Now for the plumbing! This part can seem intimidating, but take it step-by-step. Connect your drain to the sink basin, using plumber's putty or sealant if needed to ensure a watertight seal. Attach the P-trap to the drainpipe under the sink – this is crucial for preventing sewer gases from coming back up into your laundry room (ew). Then, connect your water supply lines to your faucet, and connect the faucet to the sink basin if it's a separate unit. Use Teflon tape on all threaded connections to prevent leaks. Slowly turn on the water supply and check for leaks at all connections. If you spot any drips, tighten the connections or re-apply Teflon tape as needed. And there you have it – a functional and fabulous **diy laundry room sink**, built by you!
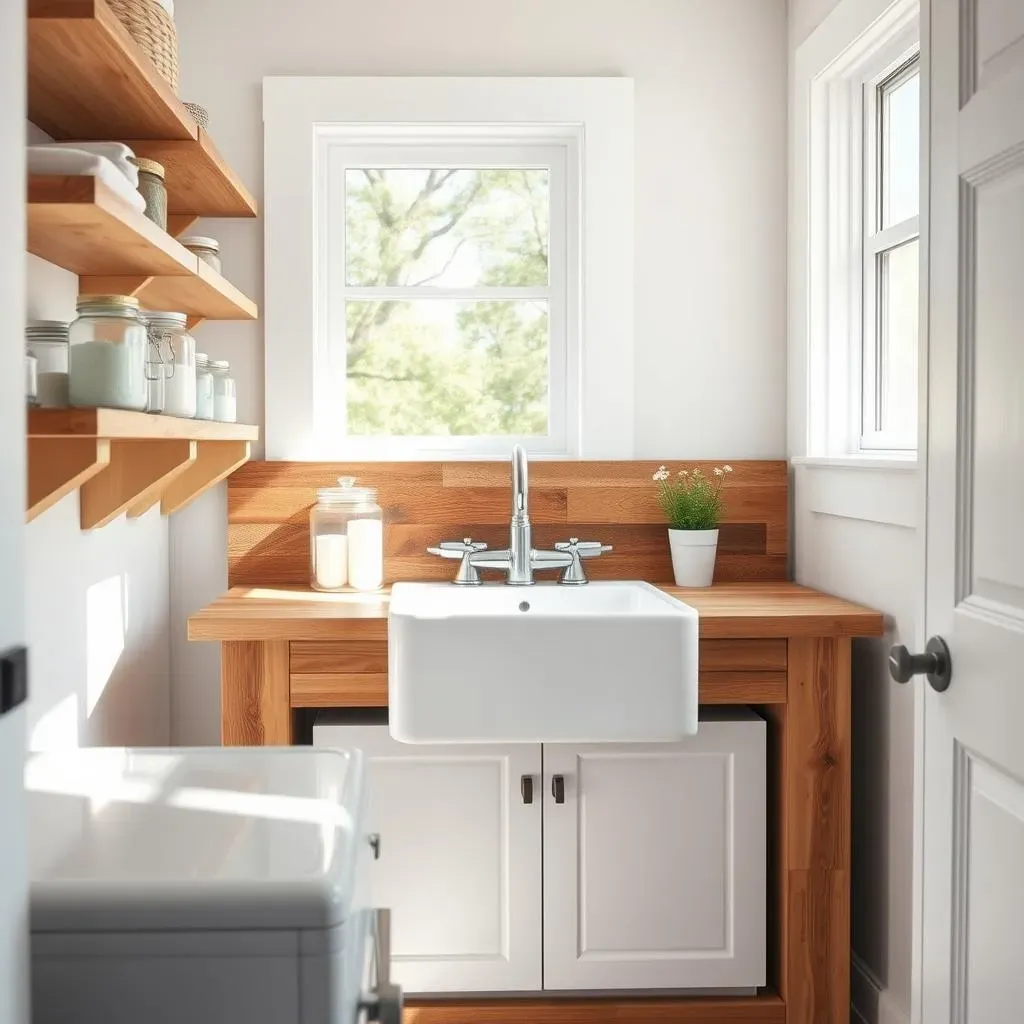
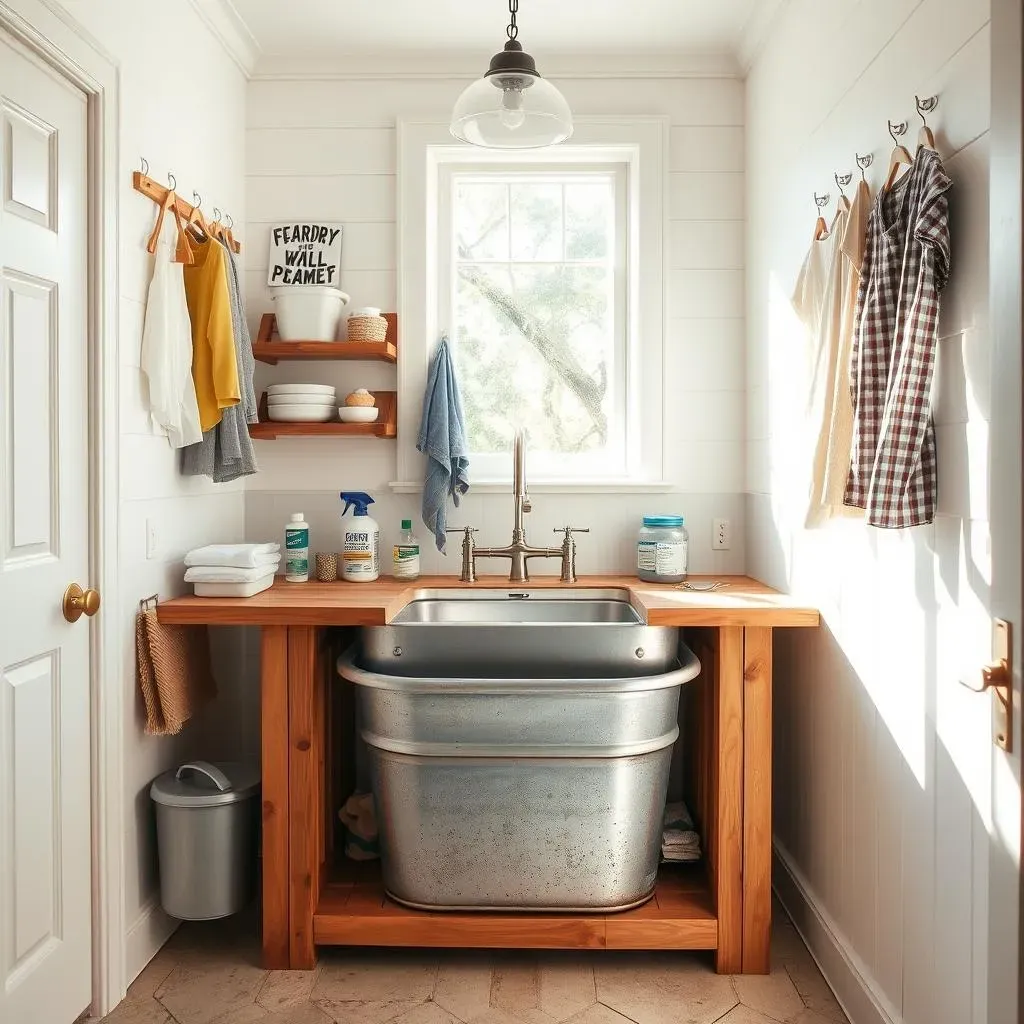
Creative DIY Laundry Room Sink Ideas to Elevate Your Space
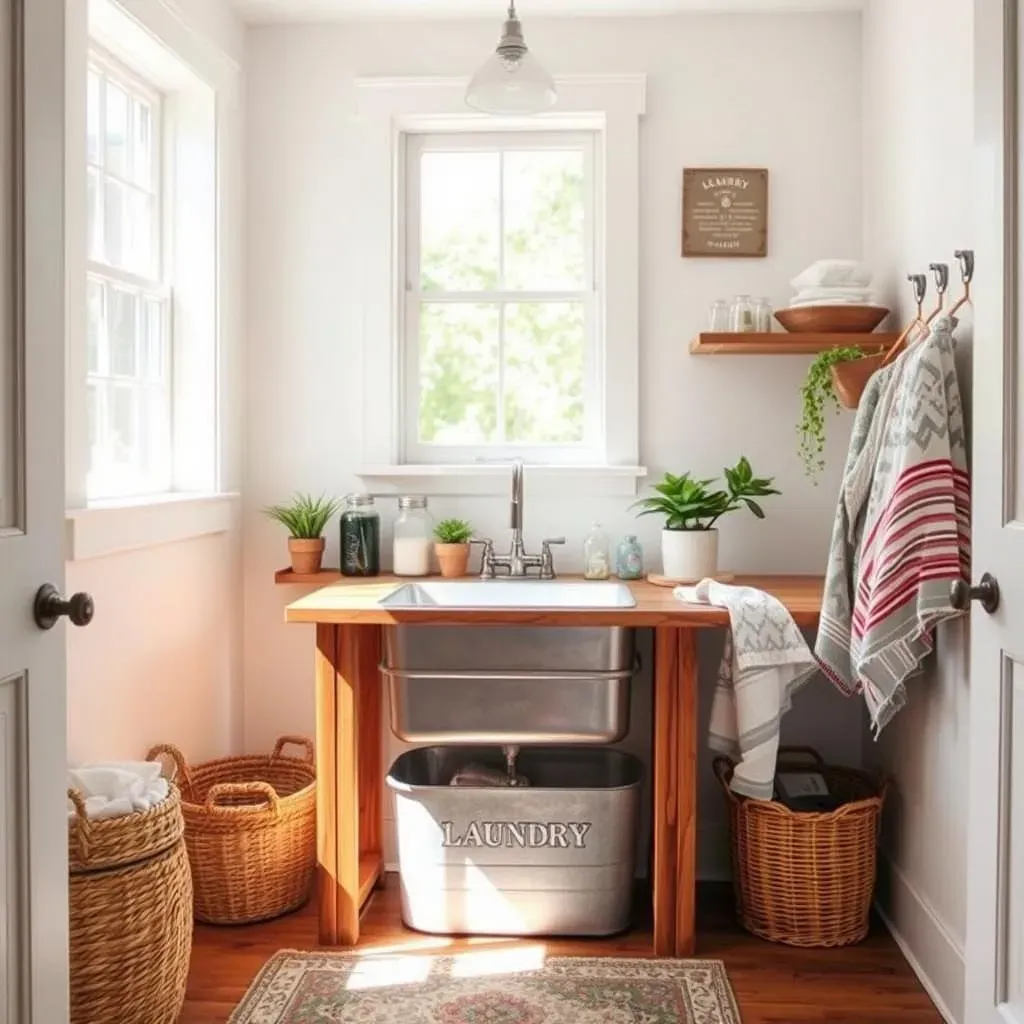
Creative DIY Laundry Room Sink Ideas to Elevate Your Space
so you've got the basic **diy laundry room sink** construction down, awesome! But let's be honest, functional is fantastic, but functional *and* fabulous? That's the real goal, right? This is where you can really let your creativity shine and take your laundry room sink from purely practical to a genuine design feature. Think beyond the standard white plastic utility sink and envision something that actually elevates your laundry space. Ready to explore some inspiring ideas to make your **diy laundry room sink** a total showstopper? Let's dive into some creative concepts that will transform your laundry room from drab to seriously fab.
Tips for Maintaining Your DIY Laundry Room Sink and Avoiding Common Issues
Tips for Maintaining Your DIY Laundry Room Sink and Avoiding Common Issues
you've poured your blood, sweat, and maybe a few stray tears into building your amazing **diy laundry room sink**. Now, the goal is to keep that beauty in tip-top shape and dodge those annoying little problems that can pop up. Think of it like this: you wouldn't buy a fancy car and then just skip oil changes and tire rotations, right? Same goes for your sink! A little bit of regular TLC will go a long way in preventing headaches and keeping your DIY masterpiece sparkling and functional for years. Let's talk about some super easy maintenance tips and how to nip common issues in the bud before they turn into major "uh oh" moments.
Simple Habits for a Happy Sink: Maintenance Must-Dos
First off, let's get real basic: wipe down your **diy laundry room sink** regularly. Yeah, it sounds obvious, but life gets busy, and it's easy to let spills and splashes just... linger. Don't! Grab a sponge or cloth and give your sink a quick wipe down after you use it, especially if you've been dealing with anything messy like泥 or paint. This prevents stains from setting in and keeps things generally cleaner. Speaking of stains, avoid harsh chemicals when you're cleaning. A mild dish soap and warm water are usually all you need. For tougher grime, baking soda paste is your secret weapon – gentle but effective. And for goodness sake, don't use abrasive scrubbers or scouring pads, especially on painted or sealed surfaces, unless you're aiming for a distressed, unintentionally aged look (and I'm guessing you're not).
- Wipe Downs are Your Friend: Quickly clean spills and splashes after each use to prevent stains.
- Mild Soap is Key: Use dish soap and warm water for regular cleaning.
- Baking Soda Power: Tackle tougher stains with a gentle baking soda paste.
- Ditch the Abrasives: Avoid harsh scrubbers that can damage finishes.
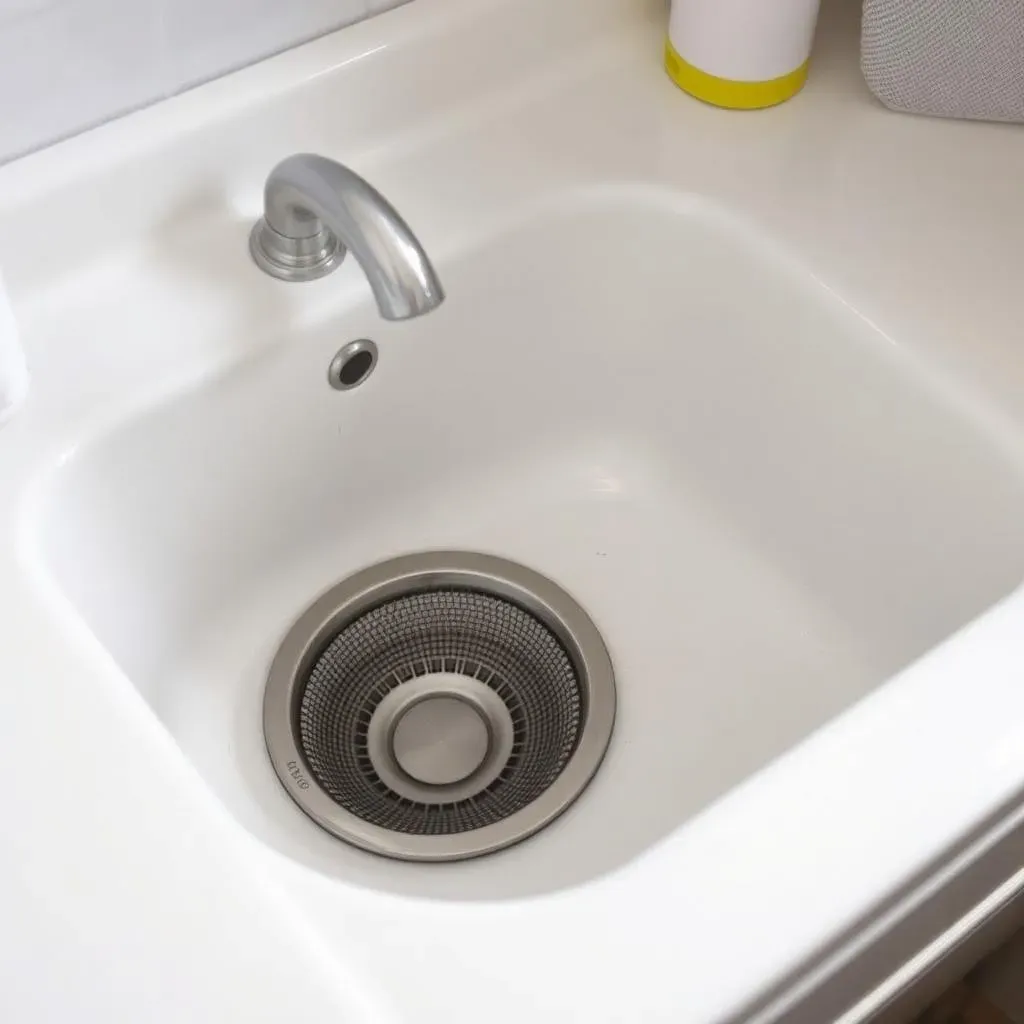
Another pro tip? Be mindful of what you're putting *down* your **diy laundry room sink** drain. Sure, it's a utility sink, not a delicate porcelain bathroom sink, but it's still not a garbage disposal. Avoid pouring grease, coffee grounds, or excessive amounts of hair down the drain – these are all plumbing clog culprits. Consider using a simple mesh strainer in your sink drain to catch hair and debris before they even have a chance to cause trouble. It's a super cheap and effective way to prevent future drain dramas. And lastly, keep an eye on your sealant, especially around the edges of the sink basin where it meets your countertop or sink base. Caulk can crack or degrade over time, especially with water exposure. If you notice any gaps or cracks, re-caulk it ASAP to prevent water from seeping in and causing damage to your DIY sink structure. A little preventative maintenance now saves you from bigger headaches (and potential repairs) down the road.
Maintenance Task | Frequency | Why it Matters |
|---|---|---|
Wipe down sink basin | After each use | Prevents stains and grime buildup |
Clean with mild soap | Weekly or as needed | Maintains cleanliness without damaging finish |
Check sealant/caulk | Monthly | Prevents water damage and leaks |
Use drain strainer | Always | Catches debris and prevents clogs |
Wrapping Up Your DIY Laundry Room Sink Project
So, you've journeyed through the world of **diy laundry room sinks**, explored the benefits, gathered your tools, and maybe even started visualizing your dream design. Building your own laundry room sink isn't just about saving money; it's about crafting a space that truly reflects your style and meets your specific needs. From basic functionality to a stylish focal point, a DIY approach puts you in control. With a little effort and creativity, you can ditch that boring utility sink and hello to a laundry room that's both practical and a pleasure to be in. Now go forth, get your hands dirty, and enjoy the satisfaction of a **diy laundry room sink** you built yourself!