Table of Contents
Tired of your laundry room looking like a disaster zone? Clothes piled high, detergent bottles everywhere, and no space to fold? You're not alone. Many of us struggle with laundry room chaos, wishing for a more organized and functional space. The good news is, transforming your laundry room doesn't require a massive renovation or a ton of money. Building **easy laundry room shelves** can be a game-changer, offering simple yet effective storage solutions. Imagine having a dedicated spot for everything, from laundry supplies to folded clothes, making laundry day less of a chore and more of a breeze. Ready to ditch the clutter and create a laundry room you actually enjoy being in? This guide will walk you through everything you need to know to build your own **easy laundry room shelves**, from gathering materials to step-by-step construction and pro organization tips. Let’s get started and bring calm to your laundry chaos!
Why Bother with Easy Laundry Room Shelves?
Why Bother with Easy Laundry Room Shelves?
Seriously, why should you even bother with easy laundry room shelves? Is it just another Pinterest-y project that looks good but doesn't actually change your life? Nope, not even close. Think about your current laundry situation. Is it a serene, organized oasis? Or more like a chaotic explosion of detergents, stray socks, and mountains of unfolded clothes threatening to topple over? If you're leaning towards the latter, then **easy laundry room shelves** are your secret weapon to reclaim sanity and space. It’s about more than just looking tidy; it's about making laundry day less of a dreaded event and more of a manageable task.
MustHave Materials for Your Easy DIY Laundry Room Shelves
MustHave Materials for Your Easy DIY Laundry Room Shelves
Wood for Your Easy Laundry Room Shelves: Keep It Simple
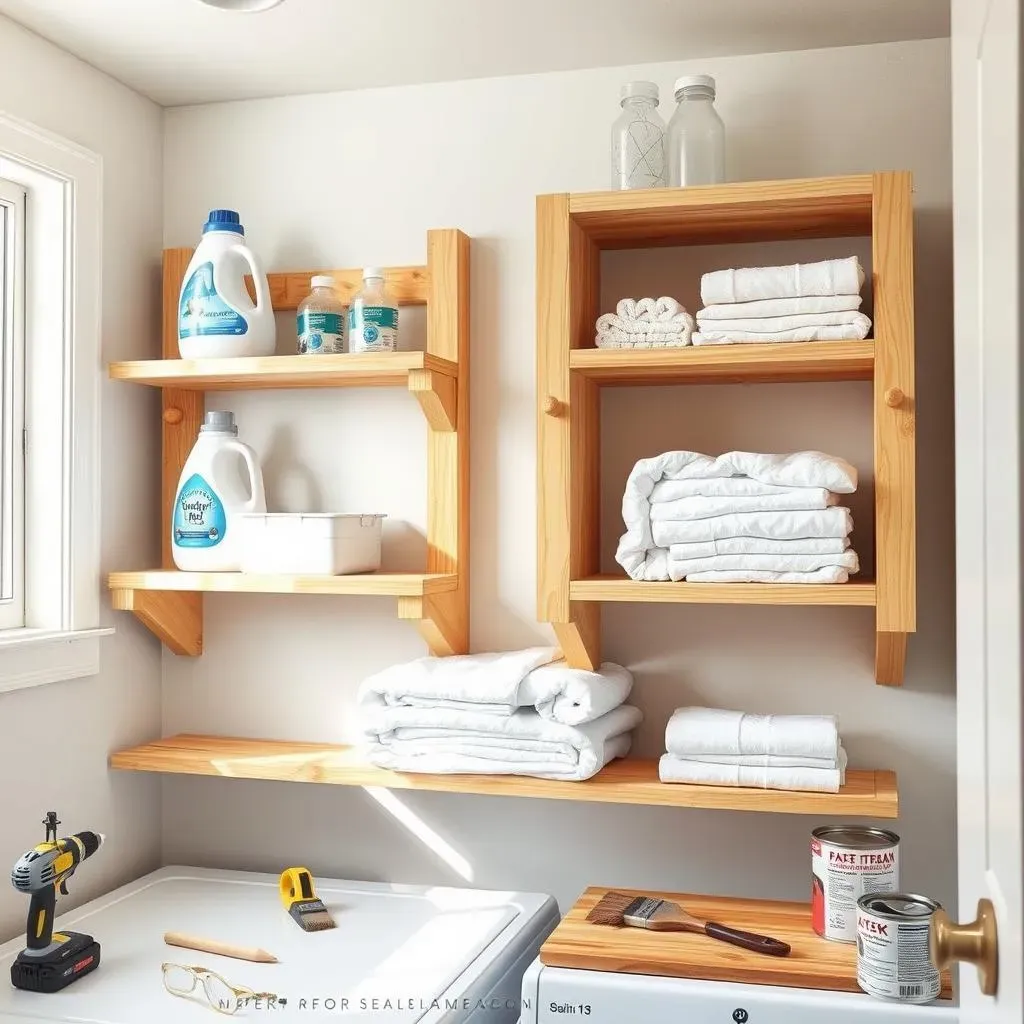
Alright, so you're convinced about the shelves, awesome! Now, let's talk about what you'll actually need to build these magical **easy laundry room shelves**. First up: wood. Don't get overwhelmed thinking you need fancy lumberyard stuff. For easy DIY shelves, simple pine or even plywood is your friend. Seriously, those 1x2s and 1x3s at your local hardware store are perfect for shelf supports. And for the actual shelf surface? Plywood is budget-friendly and gets the job done. Unless you're planning to store bricks in your laundry room, you don’t need to overthink this part. Keep it light, keep it simple, keep it pine or plywood.
Fasteners and Tools: The Essentials for Easy Laundry Room Shelves
Next, let’s chat about the bits and bobs that hold it all together. You'll need screws, and probably some nails if you're feeling fancy or want to use a nail gun (which, let's be honest, is kinda fun). Cabinet screws are great for attaching your shelf supports to the wall because they’re sturdy and designed for this kind of thing. For attaching the shelf tops to the supports, wood screws or even nails will work just fine. Tool-wise, you're looking at needing a drill – cordless is king for maneuverability – a level (unless you enjoy the chaotic, slanted shelf look), a measuring tape (measure twice, cut once, remember?), and a saw. A circular saw is awesome if you have one, but even a hand saw will work if you’re feeling old school. Don't forget safety glasses! No one wants sawdust in their eyeballs.
Material Category | Specific Items | Why You Need It |
|---|---|---|
Wood | 1x2 or 1x3 Pine, 3/4" Plywood | Shelf supports and shelf surfaces - simple and affordable. |
Fasteners | Cabinet Screws, Wood Screws or Nails | To securely attach shelves to walls and shelf components together. |
Tools | Drill, Level, Measuring Tape, Saw, Safety Glasses | For measuring, cutting, assembling, and staying safe. |
Finishing Touches: Making Your Easy Laundry Room Shelves Look Good
so you've got your wood, your screws, and your tools. Almost there! Think about how you want your **easy laundry room shelves** to look. Raw wood is… well, raw. Sealer is a good idea to protect the wood, especially in a laundry room where things can get damp. A water-based sealer is easy to use and low-VOC, which is nice. Stain can add a bit of color and bring out the wood grain if you’re into that rustic vibe. Paint is your go-to if you want to match your walls or add a pop of color. Brushes, sandpaper (for smoothing out any rough edges – because splinters are not chic), and maybe some wood filler if you make any oopsies with the saw (we’ve all been there). These finishing touches are what take your shelves from ‘functional’ to ‘actually looks like I meant to do that’.
StepbyStep Guide: Building Your Own Easy Laundry Room Shelves
StepbyStep Guide: Building Your Own Easy Laundry Room Shelves
Measure and Mark: The Golden Rule of Easy Laundry Room Shelves
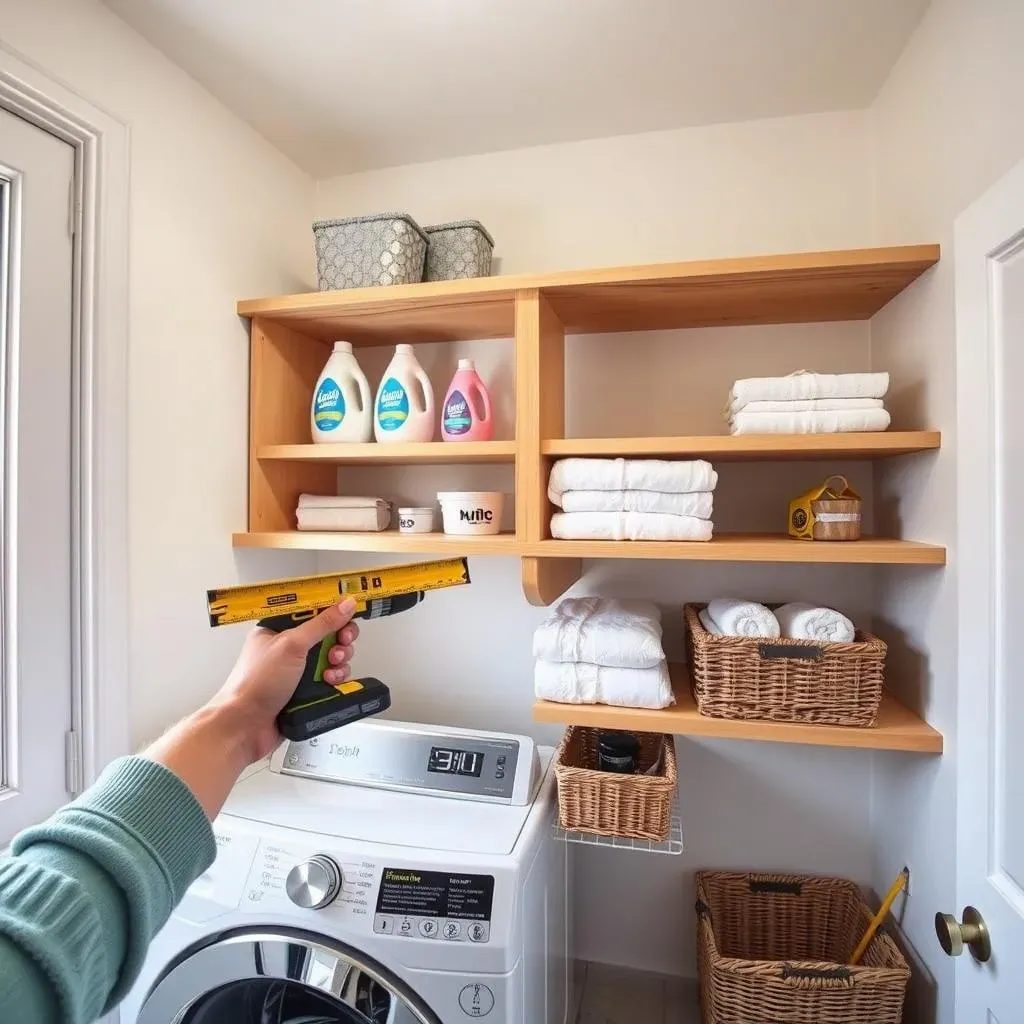
Alright, let’s get our hands dirty, but first, a little prep work. Seriously, measuring is not the fun part, but trust me, it’s the make-or-break of your **easy laundry room shelves**. Grab your measuring tape and that level. First, decide how high and how wide you want your shelves. Think about what you're storing. Tall detergent bottles? Big baskets? Measure those items to make sure your shelf heights are actually useful. Once you've got your heights figured out, use the level and a pencil to mark where your shelf supports will go on the wall. Pro tip: wall studs are your best friends. Use a stud finder (or the knuckle-knock method if you’re feeling brave) to locate them and try to align your supports with those studs. It makes everything way sturdier. Mark those stud locations too, you’ll thank yourself later.
Install the Supports: Making Your Easy Laundry Room Shelves Solid
Now for the building part! Take your pre-cut 1x2 or 1x3 pine pieces – these are your shelf supports – and line them up with the marks you made on the wall. Using your drill and those cabinet screws, pre-drill pilot holes through the supports and into the wall studs. Pre-drilling prevents the wood from splitting, especially with pine, which can be a bit soft. Then, drive those screws in, making sure the supports are nice and snug against the wall. Double-check with your level that they’re straight – wonky shelves are no fun. Repeat this for all your shelf supports, remembering to space them out according to your shelf measurements. If you're adding side supports (which is a great idea for extra stability), do those now too, making sure they’re level with the back supports. This framework is what’s going to hold everything up, so make it solid!
Step | Action | Why it's Important |
|---|---|---|
1. Measure & Mark | Determine shelf size, mark support locations on wall using level, locate studs. | Ensures shelves fit the space and are level and sturdy. |
2. Install Supports | Pre-drill pilot holes, attach supports to wall studs with cabinet screws, check for level. | Creates a strong, level base for the shelves. |
Making the Most of Your New Easy Laundry Room Shelves: Organization and Style Tips
Making the Most of Your New Easy Laundry Room Shelves: Organization and Style Tips
Declutter and Conquer: Laundry Room Organization Hacks
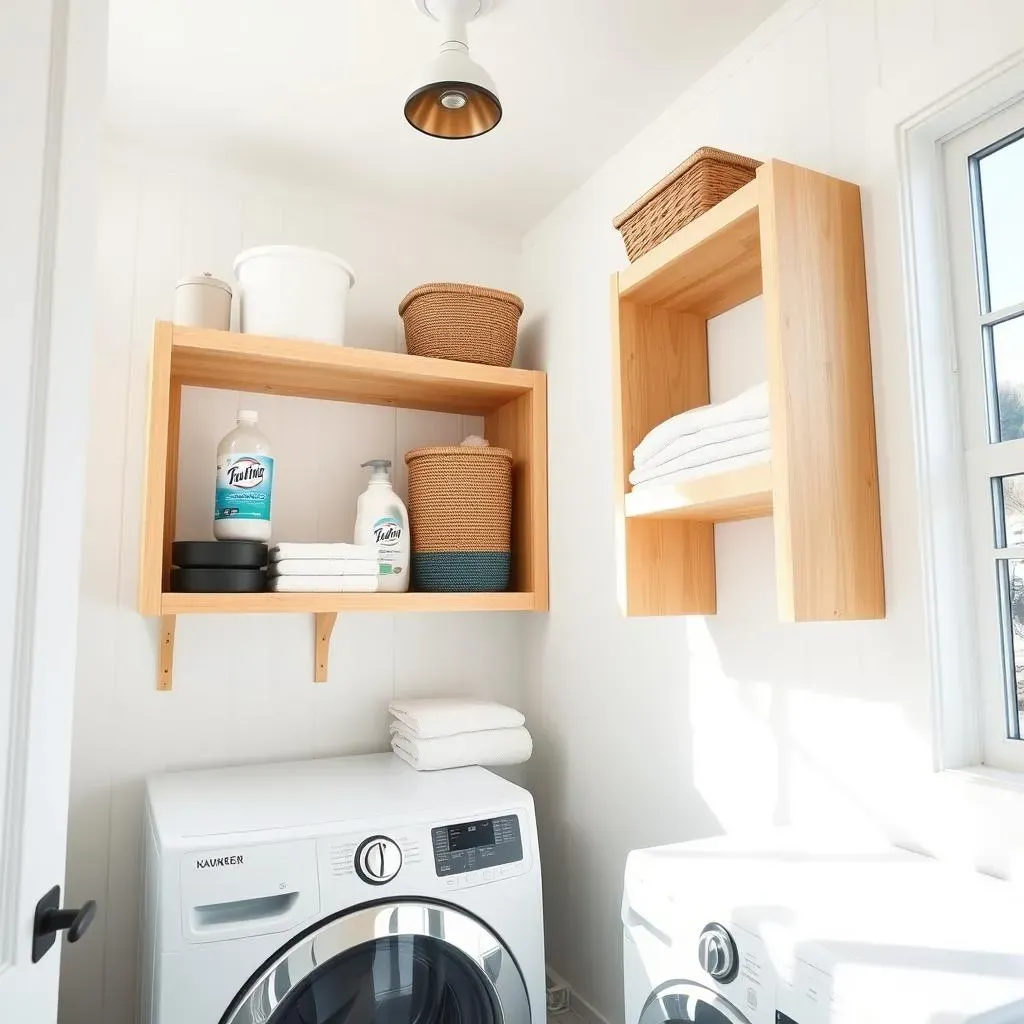
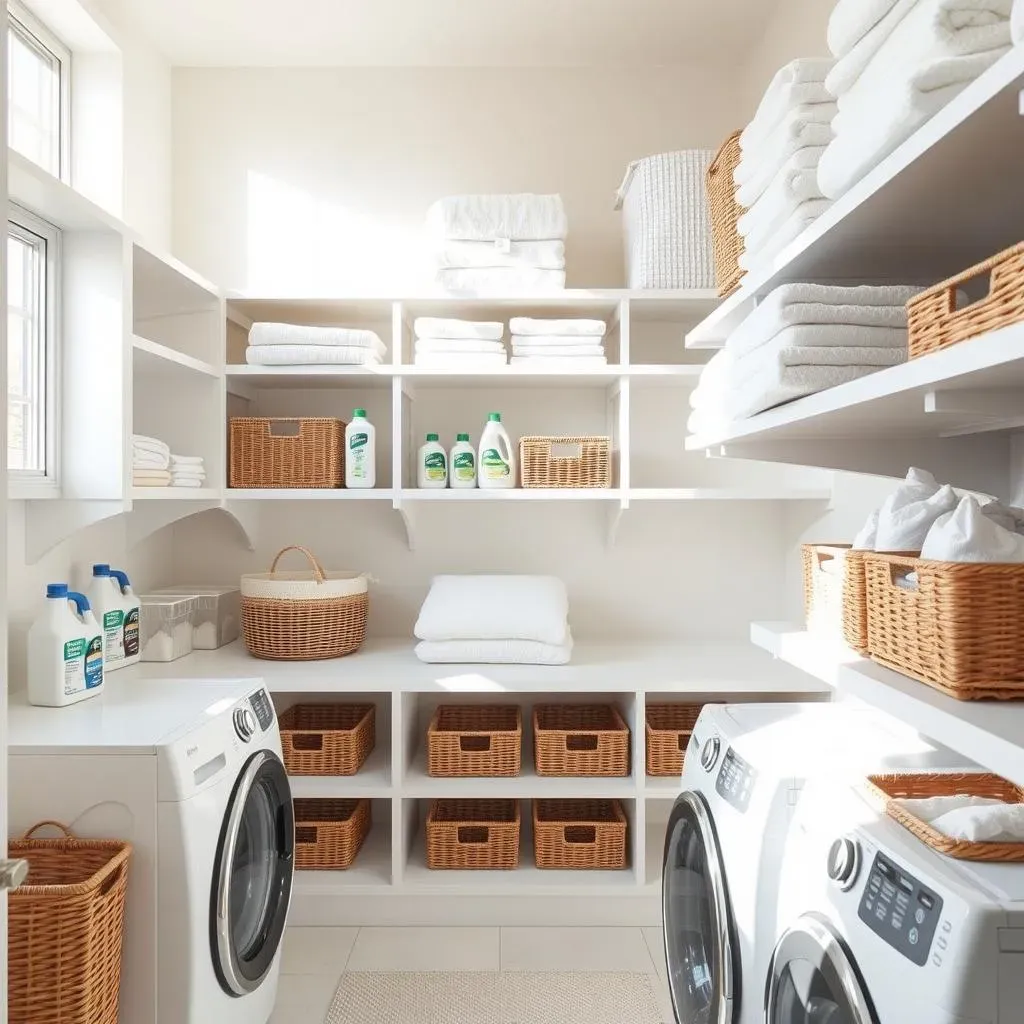
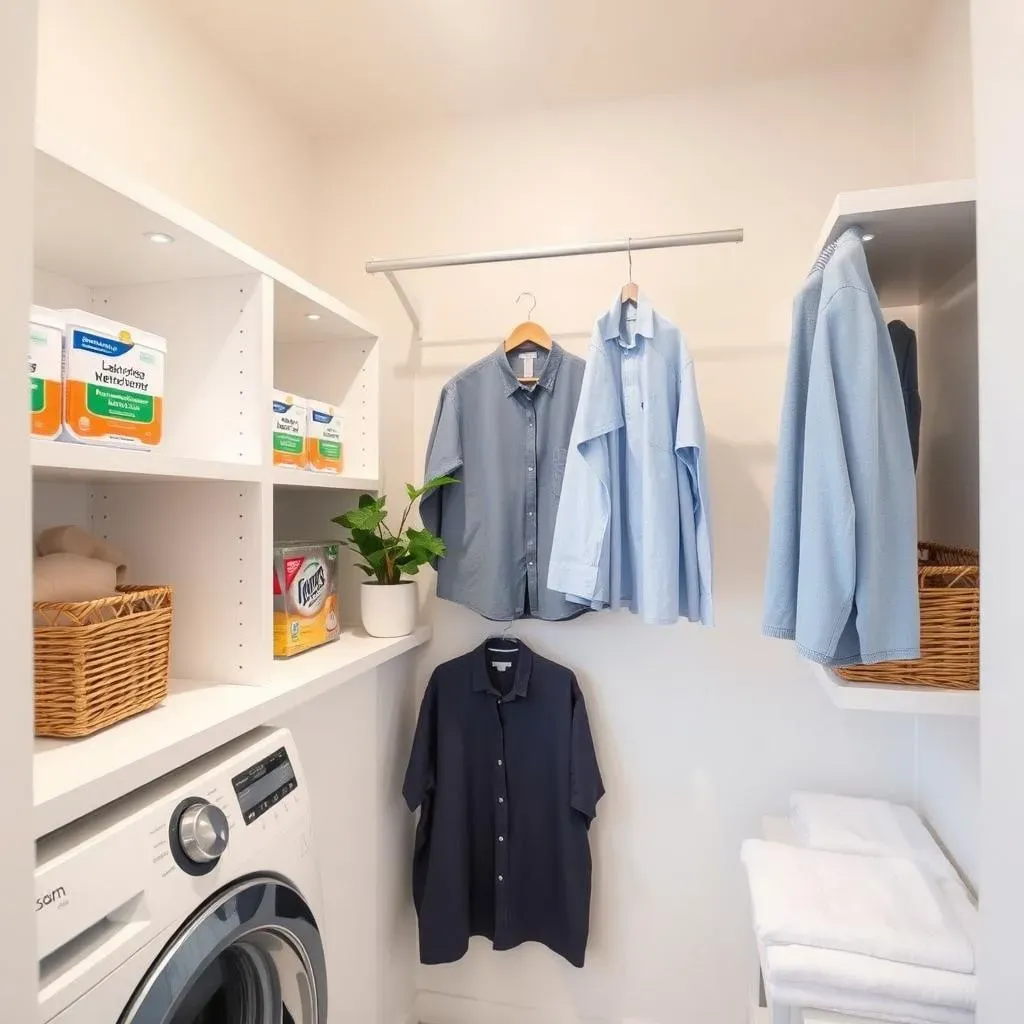
shelves are up, looking good! But now what? Just piling stuff on them isn't exactly "making the most" of your new **easy laundry room shelves**, right? First things first: declutter. Be honest, how many half-empty detergent bottles do you have lurking around? Toss the expired stuff, consolidate the rest. Baskets and bins are your new best friends. Think about categories: laundry detergent, dryer sheets, stain removers, cleaning cloths. Group similar items together in baskets. Clear bins are awesome because you can see what’s inside, but woven baskets add a nice touch of texture. Vertical space is gold, too. Stackable bins or even shelf risers can double your storage without taking up more shelf real estate. And don't forget the walls *above* the shelves! A simple rod for hanging clothes straight out of the dryer? Genius. Hooks for ironing boards or even a cute little caddy for clothespins? Details matter.
Styling Your Shelves: Laundry Room Chic is a Thing
Who says laundry rooms have to be purely functional and, let's face it, kinda ugly? Your **easy laundry room shelves** are a chance to inject some personality into this often-overlooked space. Think beyond just storage. Add a plant! A little greenery makes any space feel more alive. Decorative jars for detergent pods or clothespins? Totally elevates the look. And lighting! If your laundry room is a dark cave, a simple under-shelf light can make a huge difference, both practically and aesthetically. Consider統一the colors. Matching baskets or containers create a cohesive and calming feel. Even something as simple as folding your towels and linens neatly instead of just shoving them on the shelf makes a visual impact. Seriously, a few small styling tweaks and suddenly your laundry room is less of a dungeon and more of a… well, a pleasant place to be. maybe not *pleasant*, but definitely less of a drag.
Organization Tip | Style Tip |
|---|---|
Use clear bins to see contents easily. | Add a small plant for freshness. |
Group similar items in baskets. | Use decorative jars for laundry supplies. |
Utilize vertical space with stackable bins. | Install under-shelf lighting for ambiance. |
Hang a rod above shelves for drying clothes. | Fold towels and linens neatly for visual appeal. |
Wrapping Up: Enjoy Your Newly Organized Laundry Space with Easy Laundry Room Shelves
So, there you have it! Building your own **easy laundry room shelves** is totally doable and makes a massive difference. No more tripping over detergent or hunting for dryer sheets. Just clean lines, organized supplies, and maybe even a little pride every time you step into your laundry room. Now, grab those tools, pick out your wood, and get building. Your future, clutter-free laundry room self will thank you. Go forth and conquer that laundry chaos!