Table of Contents
Let's be honest, the utility room often feels like the forgotten corner of the house. It's where the washing machine rumbles, the dryer hums, and cleaning supplies gather dust. Functionality usually trumps form here, leaving the space feeling a bit... drab. But who says practical can't also be pretty? Your utility room handles moisture, spills, and general household grime, making durable, easy-to-clean surfaces a must. This is precisely where exploring utility room wall tiles ideas makes perfect sense.
Why Utility Room Wall Tiles Make Sense
Why Utility Room Wall Tiles Make Sense
Handling the Humidity and Mess
let's talk reality. Your utility room is a zone under siege. It's where wet clothes tumble, detergent might spill, and the general humidity from washing and drying cycles hangs in the air. Paint? It peels, mildews, and stains like nobody's business. Wallpaper? Don't even get me started on how it handles persistent dampness. This is precisely why utility room wall tiles make sense from a purely functional standpoint.
Tiles, especially ceramic or porcelain, are non-porous or have extremely low porosity. Water, steam, and detergent splashes don't penetrate them. A quick wipe-down is usually all it takes to clean up spills and keep mold and mildew at bay. Think about the longevity – a tiled wall lasts decades, shrugging off the daily abuse this room endures far better than painted drywall. It's a practical investment that saves you repainting headaches down the line.
More Than Just Practicality: Easy Cleaning and Style
Beyond the moisture management, the sheer ease of cleaning is a major win for utility room wall tiles. That stray sock fluff? The drip of fabric softener? They wipe right off a tiled surface. No scrubbing embedded stains from textured paint, no worrying about lifting wallpaper seams.
But it's not just about grime. Tiling offers a design opportunity. This small, often overlooked room can actually have personality. You can use tiles to add color, texture, or pattern without overwhelming the space. A simple subway tile provides a clean, classic backdrop, while something bolder can make a statement. Utility room wall tiles make sense not just for their resilience, but for their ability to elevate a purely functional space into something visually appealing.
- Protects walls from moisture and humidity
- Resists stains and spills effectively
- Incredibly easy to clean
- Highly durable and long-lasting
- Offers significant design versatility
- Prevents mold and mildew growth
Exploring Utility Room Wall Tiles Ideas: Styles & Materials
Exploring Utility Room Wall Tiles Ideas: Styles & Materials
Picking the Right Material: It's More Than Just Pretty
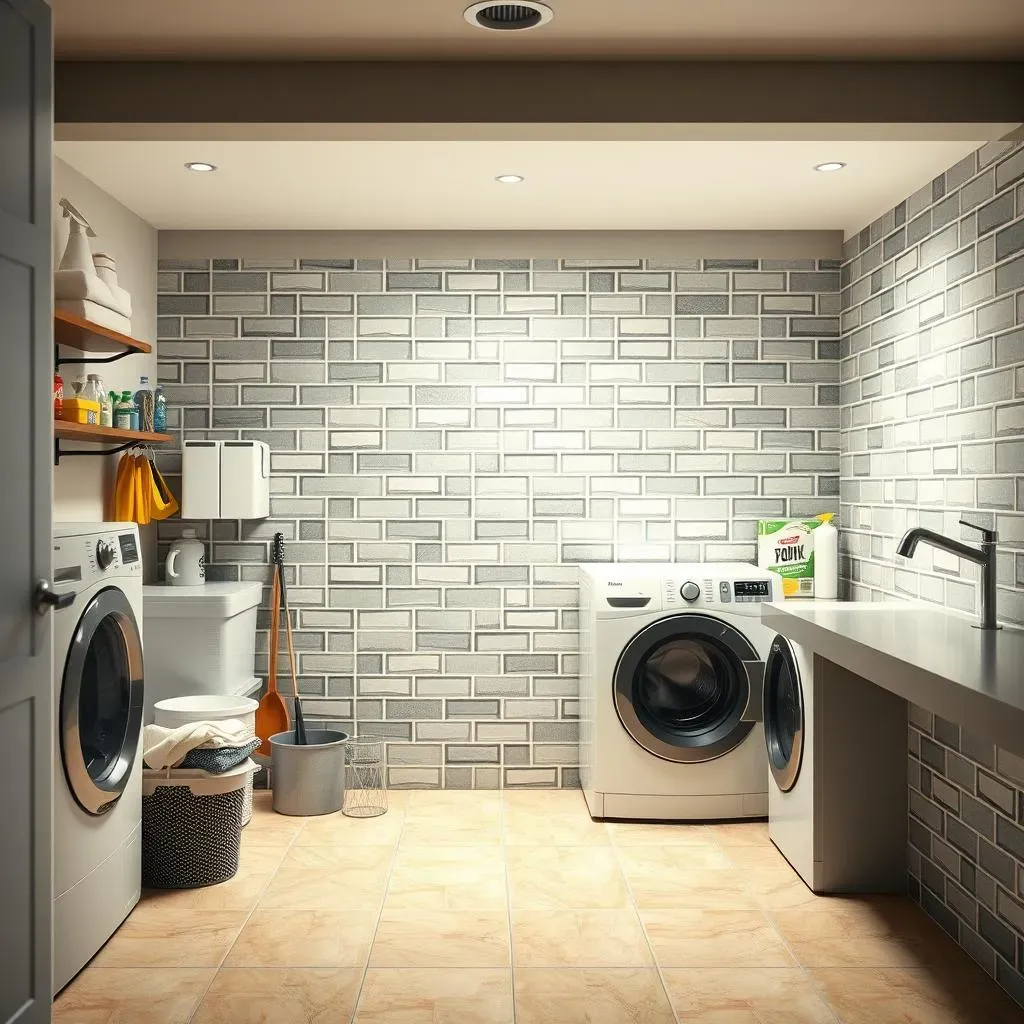
Alright, so you're sold on the idea of tile because, let's face it, your utility room deserves better than peeling paint. Now, what kind of tile are we even talking about? When you're sifting through utility room wall tiles ideas, the material is step one. Ceramic tile is the classic workhorse. It's affordable, comes in a gazillion colors and patterns, and handles moisture just fine. It's a solid, no-drama choice for walls.
Porcelain is the tougher older sibling. It's fired at higher temperatures, making it denser and even less porous than ceramic. If your utility room sees serious action, maybe even a rogue washing machine flood (it happens!), porcelain offers extra peace of mind. Natural stone like marble or slate looks gorgeous, sure, but it's often porous and needs sealing, which feels like unnecessary fuss in a room dedicated to chores. Save the fancy stuff for a less splashy spot. Glass tiles can add sparkle, but they can be pricier and sometimes tricky to install perfectly flat.
Style Points: Making the Utilitarian Look Good
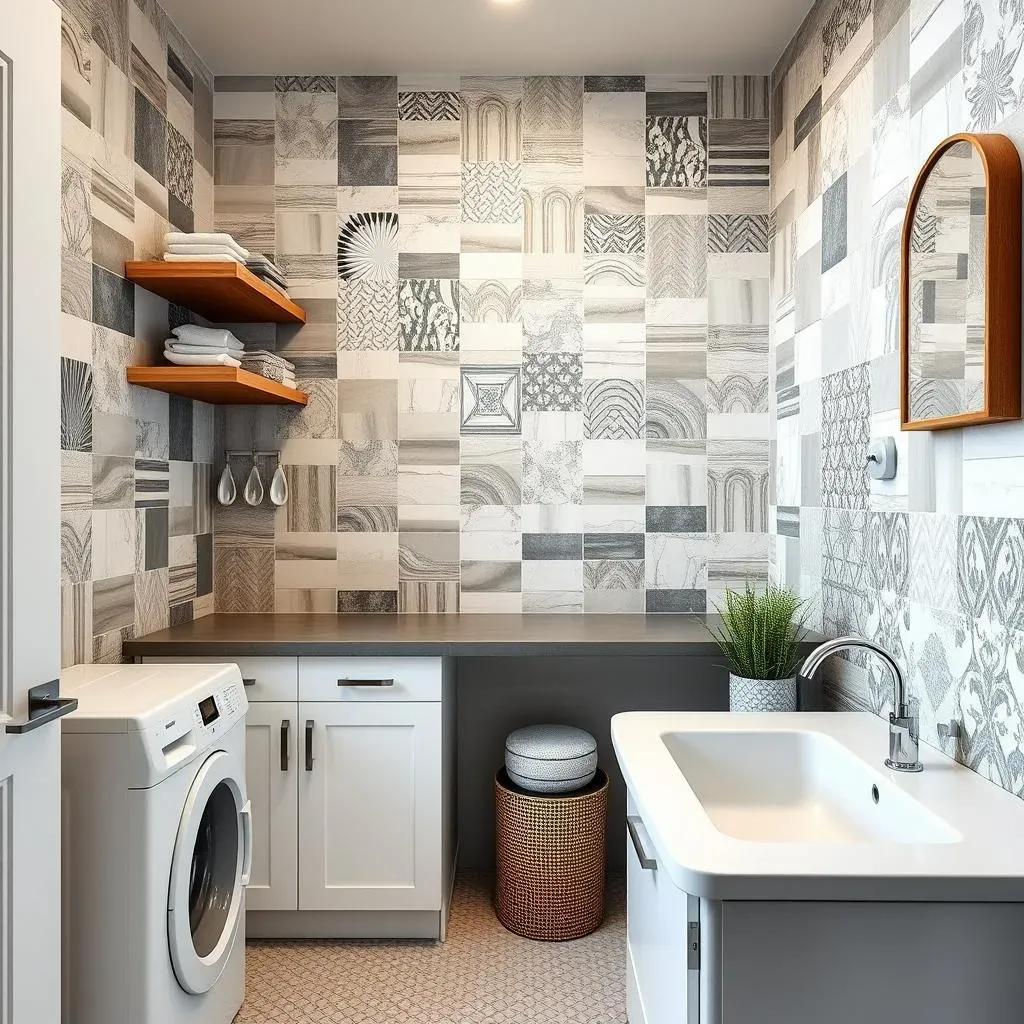
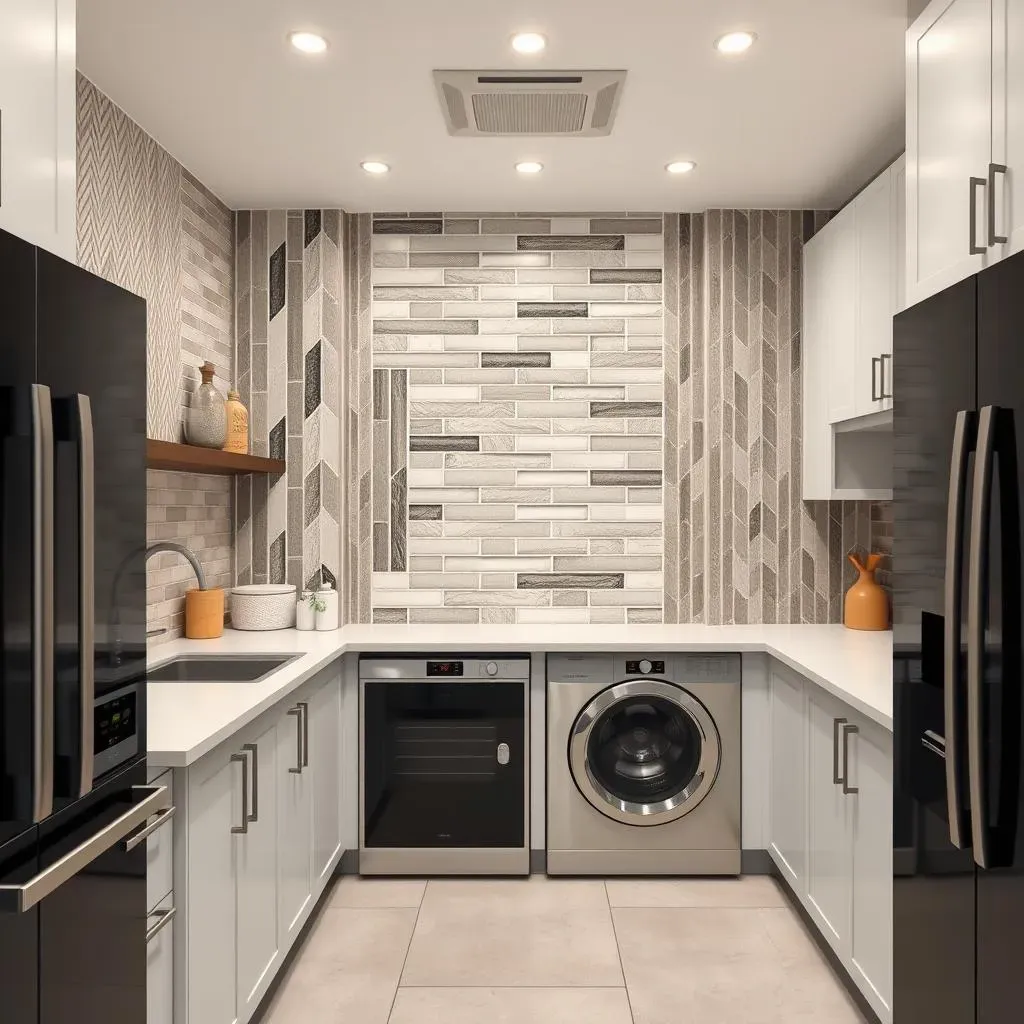
Once you've got the material sorted, the real fun begins with the style. This is where your utility room wall tiles ideas can actually get a bit creative. Subway tile is the go-to for a reason – it's timeless, clean, and versatile. You can lay it in the classic running bond, stack it vertically for a modern look, or even go herringbone if you're feeling fancy. Large format tiles mean fewer grout lines, which translates directly to less scrubbing – always a win in my book.
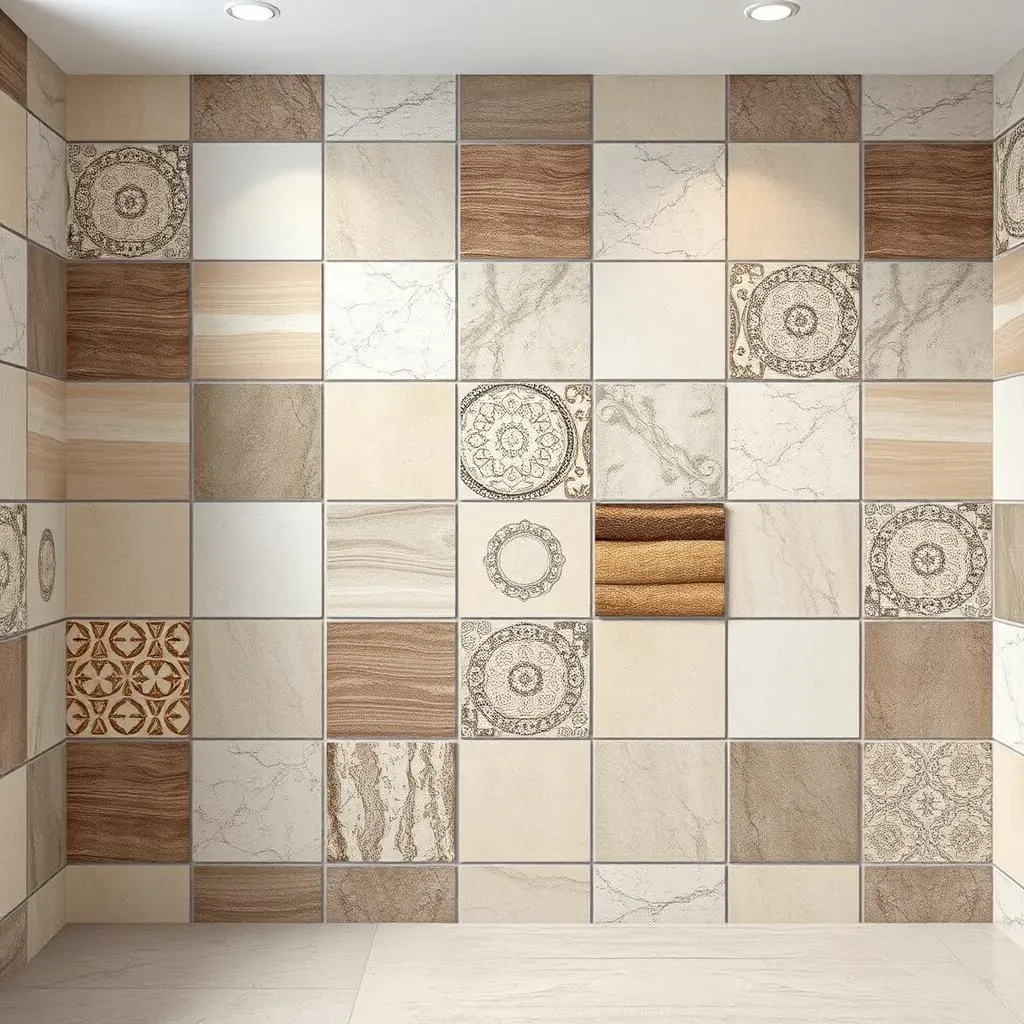
Patterned tiles? Why not? A small utility room is a great place to experiment with a bold geometric or a cheerful floral without it taking over your life. Think about a tiled accent wall behind the sink or above the machines. Even a simple splashback area can make a big difference. Don't forget texture either; some tiles have subtle relief patterns that catch the light and add another layer of interest.
Common Tile Materials for Utility Rooms
- Ceramic: Budget-friendly, wide variety, good moisture resistance.
- Porcelain: Very durable, excellent moisture resistance, suitable for high-traffic areas.
- Glass: Adds sparkle, easy to clean surface (though grout lines remain), can be more expensive.
- Vinyl Tile (Luxury Vinyl Tile - LVT): Not traditional tile, but a good water-resistant option for walls in some cases, often peel-and-stick for easy install.
Designing with Utility Room Wall Tiles Ideas: Patterns & Layouts
Designing with Utility Room Wall Tiles Ideas: Patterns & Layouts
Playing with Tile Patterns
Once you've picked your tile material and style, how you actually arrange them on the wall totally changes the look. This is where the fun really starts with utility room wall tiles ideas – playing with patterns. The classic subway tile doesn't just have to be laid straight; try a herringbone pattern for a touch of sophistication or a vertical stack for a more contemporary feel. If you're using square tiles, laying them on a diagonal can make the room feel wider, which is a neat trick in a cramped utility space.
Don't be afraid to mix things up a bit. Maybe you use a simple, clean tile for most of the wall and then introduce a smaller, patterned tile as a border or an accent strip. Or, if you're feeling bold, tile one entire wall in a striking geometric pattern and keep the others simple. The utility room is a low-stakes area to experiment with design, so go for it. A patterned floor tile paired with a simpler wall tile is another classic approach that works well.
Considering Layout and Area Coverage
Think about how much of the wall you actually need to tile. Do you need full floor-to-ceiling coverage, or just a backsplash behind the sink and appliances? Tiling just the splash zone is a practical choice for protection and adds a decorative element without the cost or effort of tiling the entire room. If you have open shelving, tiling the wall behind the shelves can create a lovely focal point.
Consider the size of the room and the tiles you're using. Large format tiles can make a small room feel bigger because there are fewer grout lines breaking up the surface. On the flip side, smaller mosaic tiles can add intricate detail and texture. When planning your utility room wall tiles ideas, sketch it out first. See how the patterns and tile sizes look on paper before you commit to the wall. Measure twice, tile once, as they say.
Popular Tile Layouts for Utility Rooms
- Classic Running Bond (Subway): Timeless and versatile.
- Stack Bond: Clean, modern lines.
- Herringbone: Adds visual interest and sophistication.
- Diagonal: Can make a space feel wider.
- Basketweave: Creates a woven effect, good for smaller areas or accents.
- Vertical Stack: Draws the eye upward, making walls seem taller.
Tips for Your Utility Room Wall Tiles Project
Tips for Your Utility Room Wall Tiles Project
Preparation Prevents Poor Performance (and Tile Waste)
Alright, you've got your stack of gorgeous tiles, maybe even some of those cool utility room wall tiles ideas you saw online. Before you grab the tile cutter and dive in, let's talk prep. Skipping this step is like trying to bake a cake without flour – it just won't work, or at least won't work well. First, clear the room. Everything. Washing machine, dryer, hampers, that weird collection of single socks – get it out of the way. You need a clean, empty canvas.
Next, examine your walls. Are they smooth? Free of holes? Any flaky paint or loose plaster needs scraping off. A clean, flat surface is critical for tiles to adhere properly. If the drywall is rough or uneven, you might need to skim coat it. Don't tile over mold or mildew; address the moisture source first, clean the area thoroughly, and let it dry completely. Tiling traps moisture, which is the opposite of what you want. Measure your walls carefully, twice, maybe even three times. Figure out your layout on paper first to minimize cuts and awkward slivers of tile.
Installation Isn't Just Sticking Tiles On
So, you've prepped the walls, you've got your utility room wall tiles ideas ready, and you're feeling brave. Tiling isn't rocket science, but it does require patience and precision. Get the right tools: a notch trowel for spreading adhesive, tile spacers for consistent grout lines, a wet saw or tile cutter for making clean cuts, and a level. Lots of levels. Start in the least visible corner or a central point that allows for balanced cuts on the edges.
Spread only enough adhesive for a small section at a time; it dries faster than you think. Press each tile firmly into the adhesive with a slight twist to ensure full coverage. Wipe off any excess adhesive from the tile face and grout lines immediately. Grouting is the final step, and it seals the gaps between tiles, protecting the wall behind them. Choose a grout color that complements your tiles and the overall look you're going for. Grouting takes time and elbow grease, so be prepared for that workout.
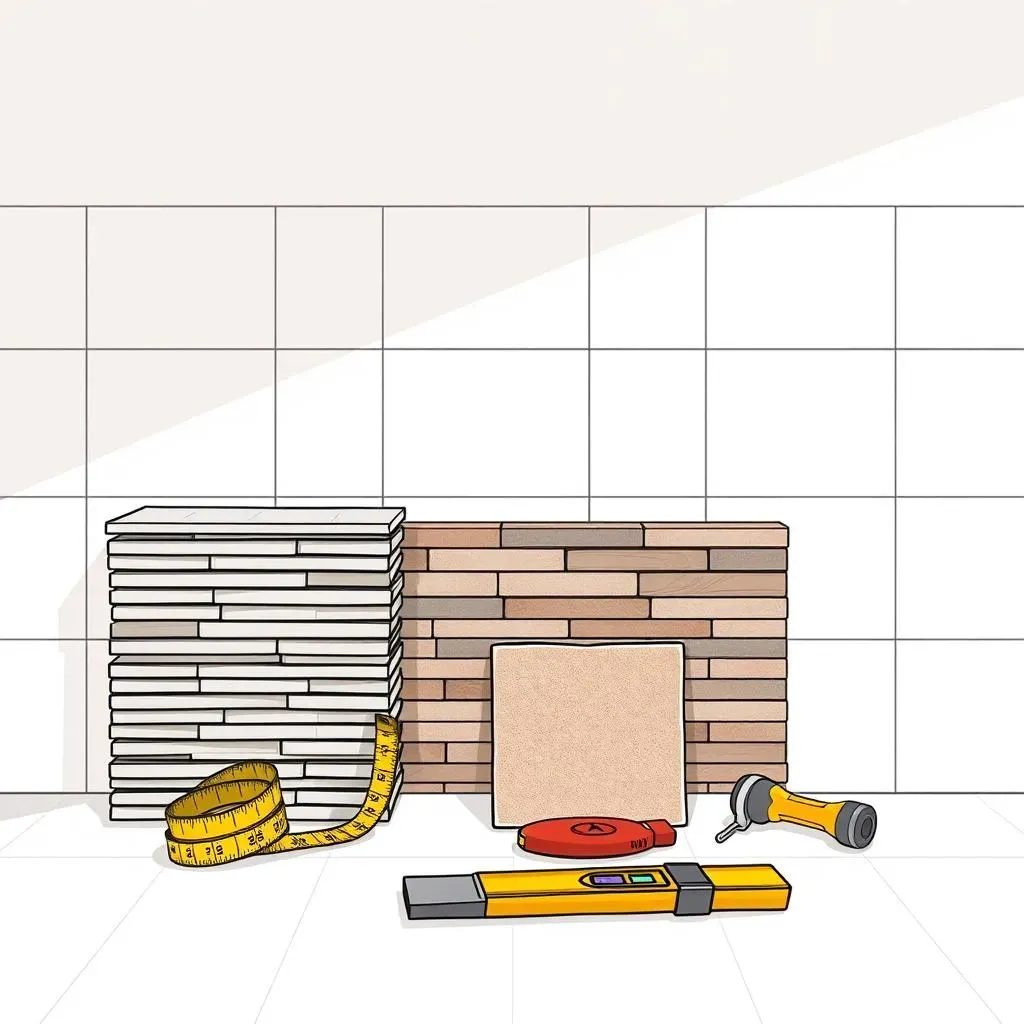
Essential Tools for Tiling Walls
- Measuring Tape & Pencil
- Level (various sizes)
- Notched Trowel (correct size for your tile)
- Tile Cutter or Wet Saw
- Tile Spacers
- Rubber Grout Float
- Large Sponge
- Buckets (for water and mixing grout)
- Safety Glasses
- Gloves
Finishing Touches and Keeping it Clean
You've tiled, you've grouted, and your utility room is already looking a hundred times better. Don't forget the finishing touches. Clean off all the grout haze from the tile surface; this usually requires a few passes with a damp sponge and then a dry cloth. For certain tile materials or grout types, you might need to apply a sealer after the grout has cured completely. This adds an extra layer of protection against stains and moisture, which is particularly wise given the environment of a utility room.
Maintaining your new tiled walls is thankfully straightforward. Regular wiping with a damp cloth or mild cleaner keeps them looking fresh. Avoid harsh chemicals or abrasive scrubbers that could damage the grout or tile surface. If you used an epoxy grout, cleaning is even easier as it's highly stain-resistant. Enjoy your upgraded, easy-to-clean, and stylish utility room, a true testament to the power of smart utility room wall tiles ideas.
Tiling Your Utility Room Walls: Mission Accomplished
So, there you have it. Tiling your utility room walls isn't just some fancy design trend; it's a solid move for a space that takes a beating. You've seen the practical wins – moisture resistance, easy cleanup – and hopefully, you've found some utility room wall tiles ideas that actually sparked a bit of interest. Whether you went for simple subway tiles for a clean look or took a swing at something bolder, you've upgraded a purely functional area into something that feels a little more intentional. It might still be where the socks mysteriously vanish, but at least the walls look good doing it.